Setup & Installation guide
NOTE: DO NOT UPLOAD YOUR .env FILE TO YOUR REPO.
To set up and run the ClassMate Bot:
- Ensure you have the following installed:
- Clone this repo onto your local machine
git clone https://github.com/CSC510-Group-25/ClassMateBot.git cd ClassMateBot - In the repository directory, run
pip install -r requirements.txt - Create a
.envfile in your project's root directory (we will put things into it later) - Create a Discord bot and get its token:
- Create a Discord Account
- Create a Discord server for the bot to run in
- Create a Discord bot in the Developer Portal by following instructions here. Copy the bot's token into the
.envfile:# .env TOKEN={your-bot-token}
-
Set up the database. ClassMate Bot currently uses Heroku as a cloud platform for running the bot, and uses a PostgreSQL database hooked up to the Heroku application that runs the bot.
- Create a Heroku account.
- Sign in to Heroku and create a new Heroku application.
- Add the Heroku Postgres extension (in the
Resourcestab of the Heroku application web UI). - Acquire the PostgreSQL database connection URL (In the web UI inside the Heroku app, navigate to
Resources > Heroku Postgres > Settings > View Credentials...and note the URI). Copy this URI into the.envfile; your.envfile should now look like this:# .env TOKEN={your-bot-token} DATABASE_URL={your-database-url}
- TO COMPLETELY SET UP THE DATABASE, SEE THE SECTIONS BELOW. Under the Heroku section, follow the Installation and Database Setup guides. DO THIS BEFORE CONTINUING ON TO THE NEXT STEP.
- Start the bot. From the project root directory, run
python3 bot(orpython bot.pyon Windows) - Invite the bot to your server (Follow instructions here) (Please ensure the bot is running and that the database is set up in order for server initialization to happen properly)
- NOTE: When using the OAuth2 URL Generator, make sure you check the box which gives your bot Administrative permissions
- You should now be able to input commands and get responses from the bot as appropriate.
Working directly with the PostgreSQL database can be done through the PostgreSQL command line interface psql.
-
Install PostgreSQL on your system (details differ depending on OS) and ensure you can access the
psqlprogram through a terminal. - Set up the heroku command line tool:
- Install the heroku command line tool
- Authenticate to the Heroku CLI:
heroku login - Connect the Heroku CLI to your Heroku app: from your project's root directory run
heroku git:remote -a <name-of-your-app>
You should now be able to connect to the Heroku PostgreSQL database through the psql client by running heroku pg:psql (if this step fails you may have not installed PostgreSQL correctly.
Documentation for psql can be found here
Ensure that your PostgreSQL version matches the version (PG version) displayed when you enter heroku pg:info. (This may or may not be an issue.)
If you are using Windows, be sure to add PostgreSQL to your PATH environment variable: C:\Program Files\PostgreSQL\<VERSION>\bin
This should only be done ONCE per Heroku app.
If you used the PostgreSQL installer, you should have a program called pgAdmin4. If not, download it here.
- Login to Heroku and select your app. Navigate to
Resourcesand select Heroku Postgres. Go to Settings and click View Credentials. - Launch pgAdmin4. Right click on
Serversand then clickCreate > Server. - Under the
generaltab, choose any name you want. - Under the
connectiontab: From your Heroku credentials:- Copy and paste the Host credential into pgAdmin's Host name/address field.
- Copy and paste port into pgAdmin's port.
- Copy and paste the Database credential into pgAdmin's Maintenance database field. (This is NOT your database's name!)
- Copy and paste the User credential into pgAdmin's Username field.
- Copy and paste the Password credential into pgAdmin's Password field. For sanity's sake, tick the "save password" box.
- DO NOT PRESS SAVE YET.
- Go to the
SSLtab in pgAdmin. Under SSL Mode, select Require. - Go to the
Advancedtab. Inside the DB Restriction field, enter your Heroku Database credential. (This is the same string you entered into Maintenance Database.) DO NOT SKIP THIS STEP. - Now you can press save.
- Inside your newly created server, open up the
Databases > Schemas > Publicdrop down lists. Right click onTablesand select theQuery Tool. - Inside the query tool, click on
Query Editor.Copy and paste the contents of this SQL file into the editor and then click on the execute button (looks like a play button). - Right click on
Tablesand selectrefresh.
Congratulations! You now have your tables set up.
This is recommended if you plan on testing your changes before pushing them to github. Be sure to turn off any Heroku dynos that may be active!
- From the project root directory, run
python3 bot(orpython bot.pyon Windows). - Test your changes in your Discord server.
- If you want to reload the bot, hit
ctrl+cin the terminal and run the bot again.
Easy!
Every member of your group can have their own private Discord server and bot. Each bot should be connected to its own Heroku app and database, however. To setup your bot, simply follow this guide from the beginning for each bot!
NOTE: You do NOT need to follow this step for the database to work properly!
In order to run the bot through Heroku, first ensure that the bot is connected to, and deployed from, your GitHub repo. To do this, navigate to Deploy > GitHub in the Heroku web UI for your app and connect the app to your ClassMateBot fork. After the app is deployed, navigate to Resources and click the pencil icon, flip the switch to on, and click confirm, within the worker dyno.
Be sure to add your bot token to your Heroku config vars!
Go to Settings > Reveal Config Vars and add TOKEN as you did for your .env file.
If you run out of dyno hours, it's still possible to run the bot. From the project root directory, run python3 bot (or python bot.py on Windows)
This bot is tested using pytest and dpytest. To run tests on the ClassMate Bot, run pytest in the root directory.
dpytest examples can be found at the developer's repository: https://github.com/CraftSpider/dpytest/tree/master/tests
Configuration files for coverage and pylint are available in the project's root directory. You can (and should!) edit them as you please.
Coverage configuration: .coveragerc
Pylint configuration: .pylintrc
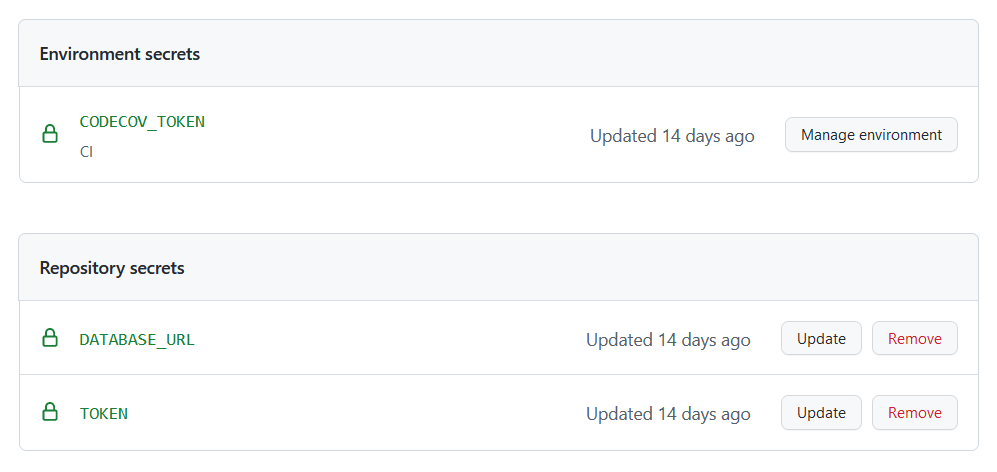
To get the workflows to properly run, add the tokens in your .env file to your repository secrets. (DO NOT UPLOAD .ENV !!!)