-
Notifications
You must be signed in to change notification settings - Fork 1
Demo Project
- Install SmartDocumentor. Get latest stable version here and see section 3 - installation if you need help.
- Contact us to the DevScope Support Team at [email protected] and let us know you are interested in using product, we will provide you with a license and plafond as well as access to our API.
If you already have you license and plafond and you haven't activate them, please check the section 3.2 Server Installation to proceed.
Clone the repository
git clone https://github.com/DevScope/ocr-smartdocumentor.git
Open the cloned repository and check the files under Demo.
Libs - SmartDocumentor's dependencies are provided and updated in this folder.
SDConfig - Workspace configuration. Take a look on our section 2.1 - Client Configuration.
SmartDocumentor.GenericPlugin.Demo - Plugin solution. To better customize SmartDocumentor take a look on our section 2.5 - Plugins.
This demo includes two workspaces, one with field capture, accessing our API, and other with template matching. The goal is to make a simple configuration so that you can start adapting SmartDocumentor to your solution now.
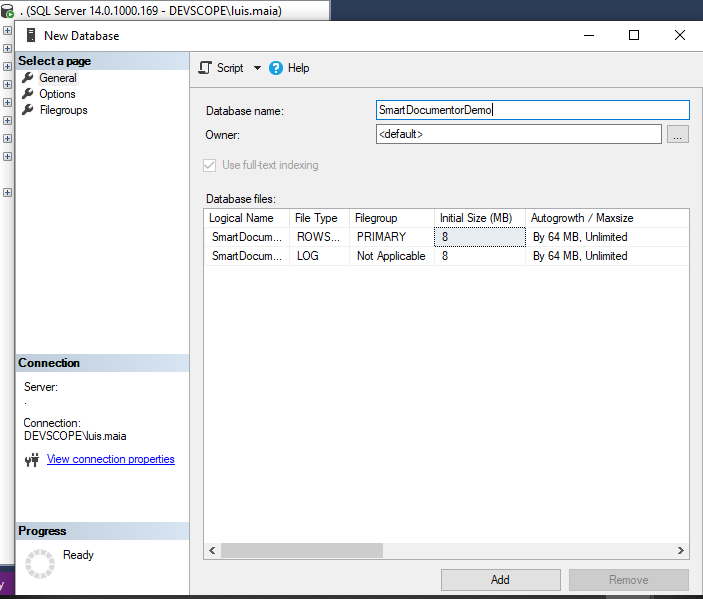
SmartDocumentor manages tasks using a simple SQL database. This database must be accessible to the user under which SmartDocumentor is running. For this demo we'll create a local database with the name SmartDocumentorDemo.

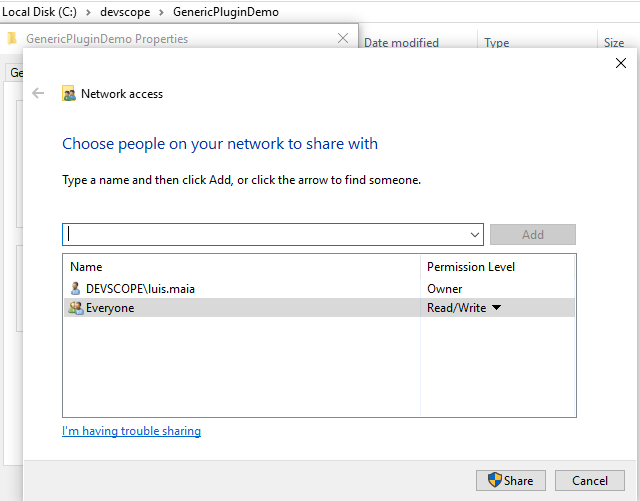
Local storage must be accessible to the user under which SmartDocumentor is running. For this demo we'll create a folder named **GenericPluginDemo ** and share to everyone.

Here you configure the access to the database and local storage. See details under section 2.1.2 - Storage Configuration This file is already configured to run with the GenericPluginDemo database and shared folder.
<?xml version="1.0"?>
<Storage xmlns:xsi="http://www.w3.org/2001/XMLSchema-instance" xmlns:xsd="http://www.w3.org/2001/XMLSchema">
  <StorageList>
    <StorageItem ID="DemoInvoice Docs" ConnectionString="Provider=sdfilesystem;Path=\\Localhost\GenericPluginDemo\DemoInvoice\SDDocs\Faturas;CredentialsMode=None;AuthProtocol=NTLM" />
    <StorageItem ID="DemoInvoice Tasks" ConnectionString="Provider=sdsql;CredentialsMode=None;AuthProtocol=NTLM;sql_data source=.;sql_initial catalog=SmartDocumentorDemo;sql_integrated security=True;sql_provider=System.Data.SqlClient" />
    <StorageItem ID="DemoInvoice Settings" ConnectionString="Provider=sdsql;CredentialsMode=None;AuthProtocol=NTLM;sql_data source=.;sql_initial catalog=SmartDocumentorDemo;sql_integrated security=True;sql_provider=System.Data.SqlClient" />

    <StorageItem ID="DemoTemplate Docs" ConnectionString="Provider=sdfilesystem;Path=\\Localhost\GenericPluginDemo\DemoInvoice\SDDocs\Templates;CredentialsMode=None;AuthProtocol=NTLM" />
    <StorageItem ID="DemoTemplate Tasks" ConnectionString="Provider=sdsql;CredentialsMode=None;AuthProtocol=NTLM;sql_data source=.;sql_initial catalog=SmartDocumentorDemo;sql_integrated security=True;sql_provider=System.Data.SqlClient" />
    <StorageItem ID="DemoTemplate Settings" ConnectionString="Provider=sdsql;CredentialsMode=None;AuthProtocol=NTLM;sql_data source=.;sql_initial catalog=SmartDocumentorDemo;sql_integrated security=True;sql_provider=System.Data.SqlClient" />
  </StorageList>
</Storage>
Our team will provide you with access to our API so you can benefit of automatic field extraction (such as vendor vat, dates, total net, tax value and more).
Edit the file workspace.config.xml under Devscope_DemoInvoice and search for the IDs WebApiUrl, WebApiKey and WebApiSecret you will find two matches for each, here you have to fill with the values that you got from our team.
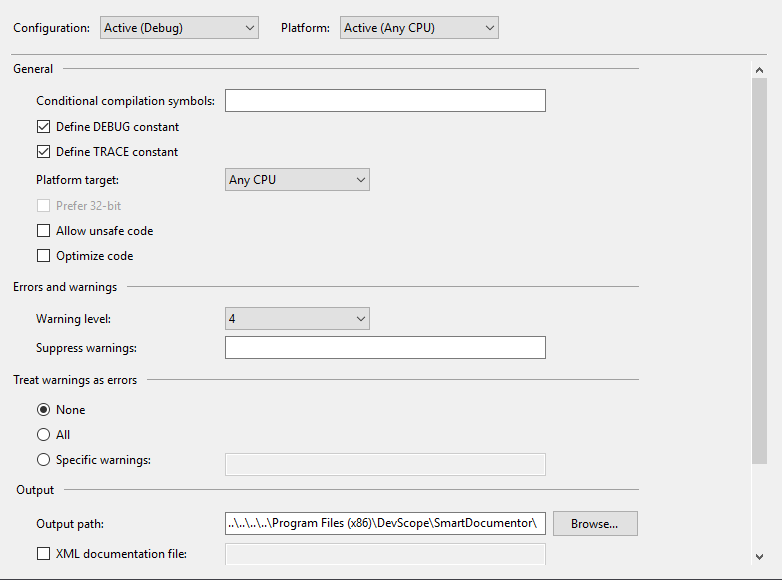
The project is configured to build to the SmartDocumentor folder, please rectify the path if needed.

Take a good look to our Technical Documentation. You can give us feedback and send us your questions to: [email protected].
We'll be updating the documentation and always updating with new features.
Adress: R. de Passos Manuel 223 3°, 4000-385 Porto, Portugal
Email: [email protected]
Phone: +315 22 375 1350
Working Days/Hours: Mon-Fri/9:00AM-19:00PM
Copyright © DevScope