Getting started
This is a basic guide how to get started with CARTO Mobile SDK under iOS. It is made for a common use case: you have some map-based data what you want to visualize on mobile map, and possibly in web also. Then you may want to add some interactions with your map view.
Steps in short:
- Upload your data to carto.com, create a map visualization (optional)
- Create minimal mobile app
- Create a license key for your app in carto.com keys management
- Add CARTO Mobile SDK to your app as dependency
- Add CARTO MapView to your app
- Configure map using viz.json of your CARTO visualization (optional)
- Add additional data: pins, user location etc to the map
- Open http://carto.com, create new account there, or sign in with existing one
- If you want to show your existing data, then import your map data to carto.com Editor/Builder. See guides about about this in CARTO Docs page
- Then create new Map. You can use various thematic maps, or just set colors and other styles for your map. See how the map works on web. In fact you can use exactly same map image in web and mobile.
- Finally click Share map, and in this page you will get a URL ending with viz.json, same what is used in Carto.js also.
- Use Xcode to create new app Project. Just use any app type you like, Single View Application would be fine. Choose Objective-C as app type for now.
- For your own app or new app take a note of the Bundle Identifier of your app - this was given in previous step. You define it in the app project when you add app, usually something something in com.yourcompany.yourapp format
- Open carto.com and go to Settings (your avatar icon in top right of Dashboard) > Your API Keys. You should find Mobile Apps tab, where you can add new apps. If you do not have Mobile Apps, then contact mobile-support@carto.com to activate it.
- Add new app, select iOS as type and provide your Bundle ID. This will generate you License Key what you need for your code
- Get SDK package latest dev build: sdk4-ios-snapshot-latest.zip
- Unzip it and copy CartoMobileSDK.framework to the Xcode project root folder. If you drag-drop it to Xcode project browser's root, then it should link it automatically with your library. Check that you have it in Build Phases > Link Binary with Libraries to be sure
- The following binaries need to be linked as well: GLKit.framework, libz.tbd
- Copy nutibright-v3.zip to your project as well. It is located in the same .zip file of SDK you just downloaded and extracted.
- Check that your project looks similar to this:

Extend ViewController and add MapView manipulation code into it. Make sure it is Objective C++, not plain Objective C class
- Rename ‘ViewController.m’ (comes with template) to ‘ViewController.mm’ to avoid compilation issues
- Add import of CartoMobileSDK/CartoMobileSDK.h
- Make ViewController.h to extend GLKViewController instead of UIViewController
- Replace YOUR_LICENSE_KEY with your license key in code below. For this you need to register your app in your CARTO web account, under API keys section.
#import <UIKit/UIKit.h>
#import <CartoMobileSDK/CartoMobileSDK.h>

@interface ViewController : GLKViewController

@end
and implementation ViewController.mm :
#import "ViewController.h"

@implementation ViewController

- (void)loadView {
  // The initial step: register your license.
  // This must be done before using MapView
  [NTMapView registerLicense:@"YOUR_LICENSE_KEY"];
  [super loadView];
}


- (void)viewDidLoad {

    [super viewDidLoad];
    // minimal map definition code

    // The storyboard has NTMapView connected as a view
    NTMapView* mapView = (NTMapView*) self.view;

    // Create online vector tile layer, use style asset embedded in the project
    NTBinaryData* styleData = [NTAssetUtils loadAsset:@"nutibright-v3.zip"];
    NTAssetPackage* assetPackage = [[NTZippedAssetPackage alloc] initWithZipData:styleData];
    NTVectorTileLayer* vectorTileLayer = [[NTCartoOnlineVectorTileLayer alloc] initWithSource: @"nutiteq.osm" styleAssetPackage:assetPackage];

    // Add vector tile layer
    [[mapView getLayers] add:vectorTileLayer];
}

@end- Modify storyboard to enable Map View
Default storyboard template uses UIView class, we need NTMapView here instead.
- Repeat next step with both Main_iPhone.storyboard (and Main_iPad.storyboard files, if you have both)
- Open Main.Storyboard, find View Controller Scene -> View Controller and View. From Navigator window find Identity Inspector, and change the first parameter (Custom Class) to NTMapView (from the default UIView).

- Run your app and it should show you map.
If you prepared (and shared) a Map in CARTO platform, then you can load it to the mobile. Use NTCartoVisBuilder for this. Note that it has to run in another thread, as it does online connections.
CartoVisBuilder works as a parser for visualization, so you define callbacks for key elements of visualization to implement key data in the viz.json, like adding map layers (most important), also you may want to set map center and zoom. This way you can control which aspects of Map are loaded in mobile, and can change some layer interpretation aspects, as sometimes you want your map to be a bit different on mobile, for visual or technical reasons.
-
To make sure your app has all fonts CARTO uses add carto-fonts.zip file to your project. You can download carto-fonts.zip from our iOs sample project. This is not needed if your Map does not have any texts.
-
A typical/minimal CartoVisBuilder implementation, you can append it to your main ViewController.mm
@interface MyCartoVisBuilder : NTCartoVisBuilder

@property NTMapView* mapView;

@end

@implementation MyCartoVisBuilder

// methods to set map center and zoom based on defined map
-(void)setCenter:(NTMapPos *)mapPos
{
    [self.mapView setFocusPos:[[[self.mapView getOptions] getBaseProjection] fromWgs84:mapPos] durationSeconds:1.0f];
}

-(void)setZoom:(float)zoom
{
    [self.mapView setZoom:zoom durationSeconds:1.0f];
}

// Add a layer to the map view
-(void)addLayer:(NTLayer *)layer attributes:(NTVariant *)attributes
{
    [[self.mapView getLayers] add:layer];
}

@end- Load CARTO vizualisation. As it has online connection, then make sure it runs on background thread:
 dispatch_async(dispatch_get_global_queue(DISPATCH_QUEUE_PRIORITY_DEFAULT, 0), ^{
        // just make sure no other layers are on map
        [[mapView getLayers] clear];

        // Create VIS loader
        NTCartoVisLoader* loader = [[NTCartoVisLoader alloc] init];

        // Load fonts package, this has all fonts you may need.
        [loader setVectorTileAssetPackage:[[NTZippedAssetPackage alloc] initWithZipData:[NTAssetUtils loadAsset:@"carto-fonts.zip"]]];
        [loader setDefaultVectorLayerMode:YES];
        MyCartoVisBuilder* visBuilder = [[MyCartoVisBuilder alloc] init];
        visBuilder.mapView = mapView;

        // Use your Map URL in next line, you get it from Share Map page. Here is a basic working sample:
        [loader loadVis:visBuilder visURL:@"http://documentation.carto.com/api/v2/viz/2b13c956-e7c1-11e2-806b-5404a6a683d5/viz.json"];

});- Run your app and it should show this map (if you use sample URL):

You can add Points, Markers, Polylines, Polygons, even 3D objects to the map with our SDK. Here is most basic sample: add simple Marker. With our SDK you do not add directly objects to map, as we try to keep them organized as Layers. So you add first a special in-memory data source where objects are kept, then a VectorLayer which uses the DataSource, and finally add the Layer to the map. For Markers in VectorLayer you need to define also style.
// Initialize a local vector data source
NTProjection* proj = [[mapView getOptions] getBaseProjection];
NTLocalVectorDataSource* vectorDataSource = [[NTLocalVectorDataSource alloc] initWithProjection:proj];
// Initialize a vector layer with the previous data source
NTVectorLayer* vectorLayer = [[NTVectorLayer alloc] initWithDataSource:vectorDataSource];
// Add the previous vector layer to the map
[[mapView getLayers] add:vectorLayer];
// Create a marker style
NTMarkerStyleBuilder* markerStyleBuilder = [[NTMarkerStyleBuilder alloc] init];
[markerStyleBuilder setSize:30];
[markerStyleBuilder setColor:[[NTColor alloc] initWithColor:0xFF00FF00]];
NTMarkerStyle* sharedMarkerStyle = [markerStyleBuilder buildStyle];
// Define position and add the marker to the Datasource (which is already in a Layer and MapView)
NTMapPos* pos = [proj fromWgs84:[[NTMapPos alloc] initWithX:24.646469 y:59.426939]];
NTMarker* marker = [[NTMarker alloc] initWithPos:pos style:sharedMarkerStyle];
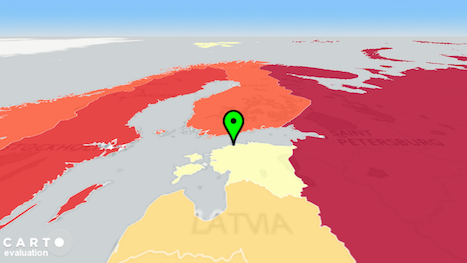
[vectorDataSource add:marker];Result should look like this:
Mobile SDK API Reference for iOs: http://cartodb.github.io/mobile-ios-samples/ , or see docObjC folder inside SDK .zip folder.
We have sample apps for all major mobile platforms:
- Android: https://github.com/CartoDB/mobile-android-samples
- iOS: https://github.com/CartoDB/mobile-ios-samples
- .NET for Xamarin (Android, iOS) and Windows Phone 10: https://github.com/CartoDB/mobile-dotnet-samples