a ) Install Arduino IDE 1.8.19 https://www.arduino.cc/en/software
b) Install Teensyduino, Version 1.56: https://www.pjrc.com/teensy/td_download.html
c) first use instructions for teensyduino https://www.pjrc.com/teensy/first_use.html
d) download Sonic PI https://sonic-pi.net/
e) Download teensy scripts https://github.com/CreativeCodingUtrecht/workshop_AIR_RHYTHM_MACHINE
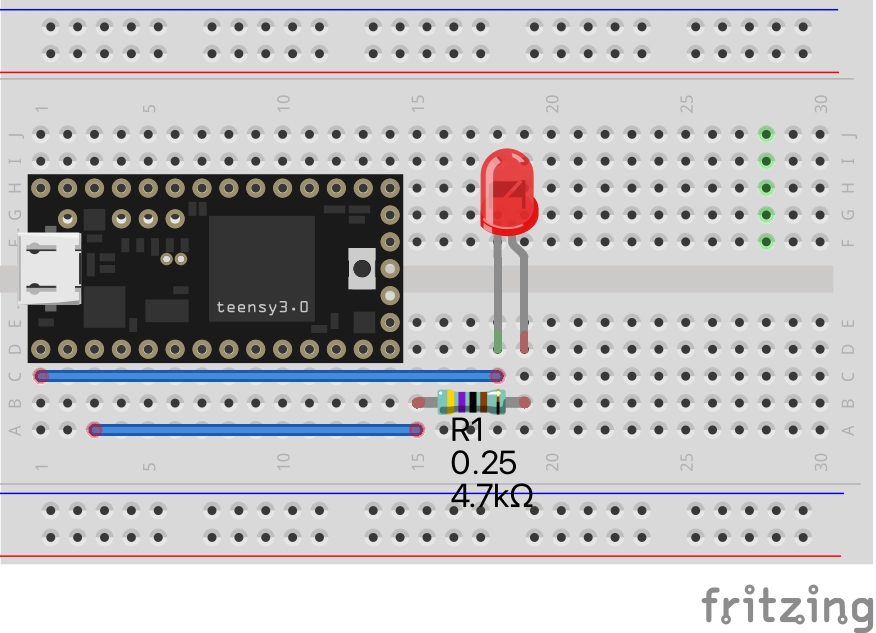
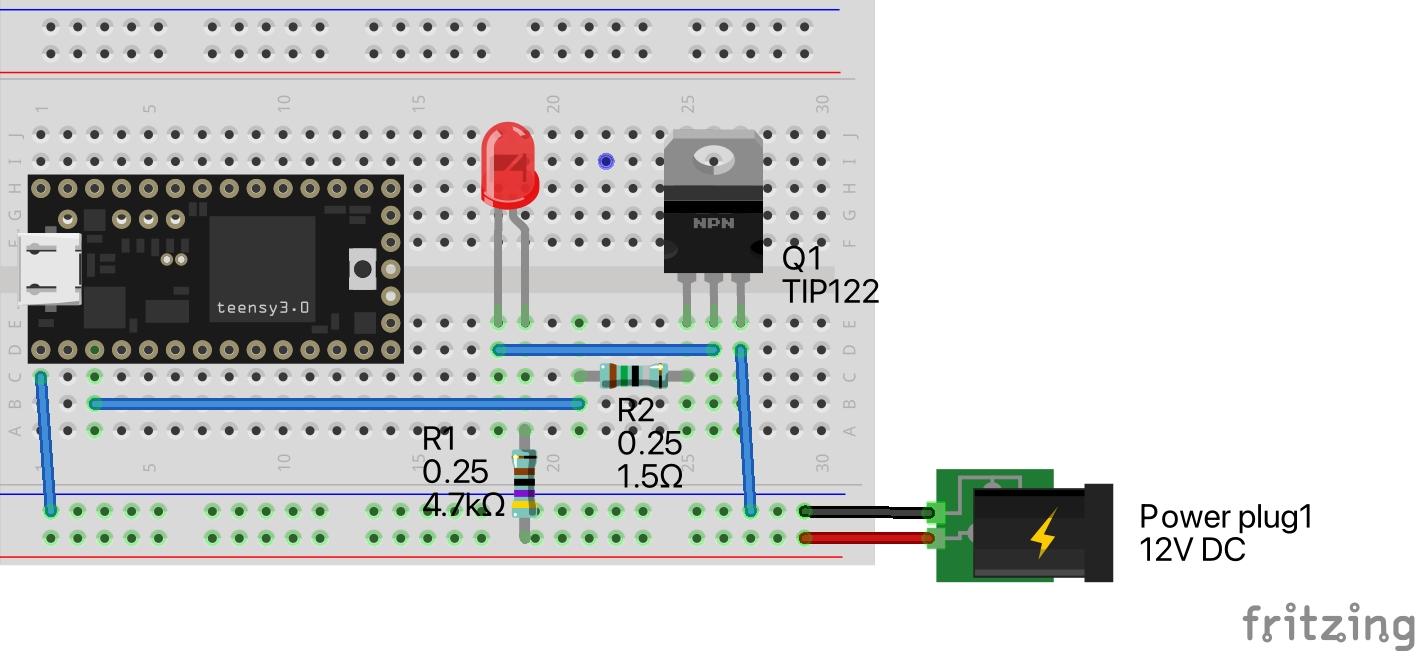
a)connect LED and 4.7K Ohm Resistor on breadboard

b) Write or Copy/Paste code below in Teensyduino https://github.com/CreativeCodingUtrecht/workshop_AIR_RHYTHM_MACHINE/blob/main/Teensy/TEENSY_BLINK_Test1/TEENSY_BLINK_Test1.ino
/*
  Blink
  Turns on an LED on for one second, then off for one second, repeatedly.

  This example code is in the public domain.
 */

int ledPin = 1;

// the setup routine runs once when you press reset:
void setup() {
  // initialize the digital pin as an output.
  pinMode(ledPin, OUTPUT);
}

// the loop routine runs over and over again forever:
void loop() {
  digitalWrite(ledPin, HIGH);   // turn the LED on (HIGH is the voltage level)
  delay(1000);               // wait for a second
  digitalWrite(ledPin, LOW);    // turn the LED off by making the voltage LOW
  delay(1000);               // wait for a second
}
c) Upload the sketch to Teensy 4.0
a)connect LED and 4.7K Ohm Resistor on breadboard
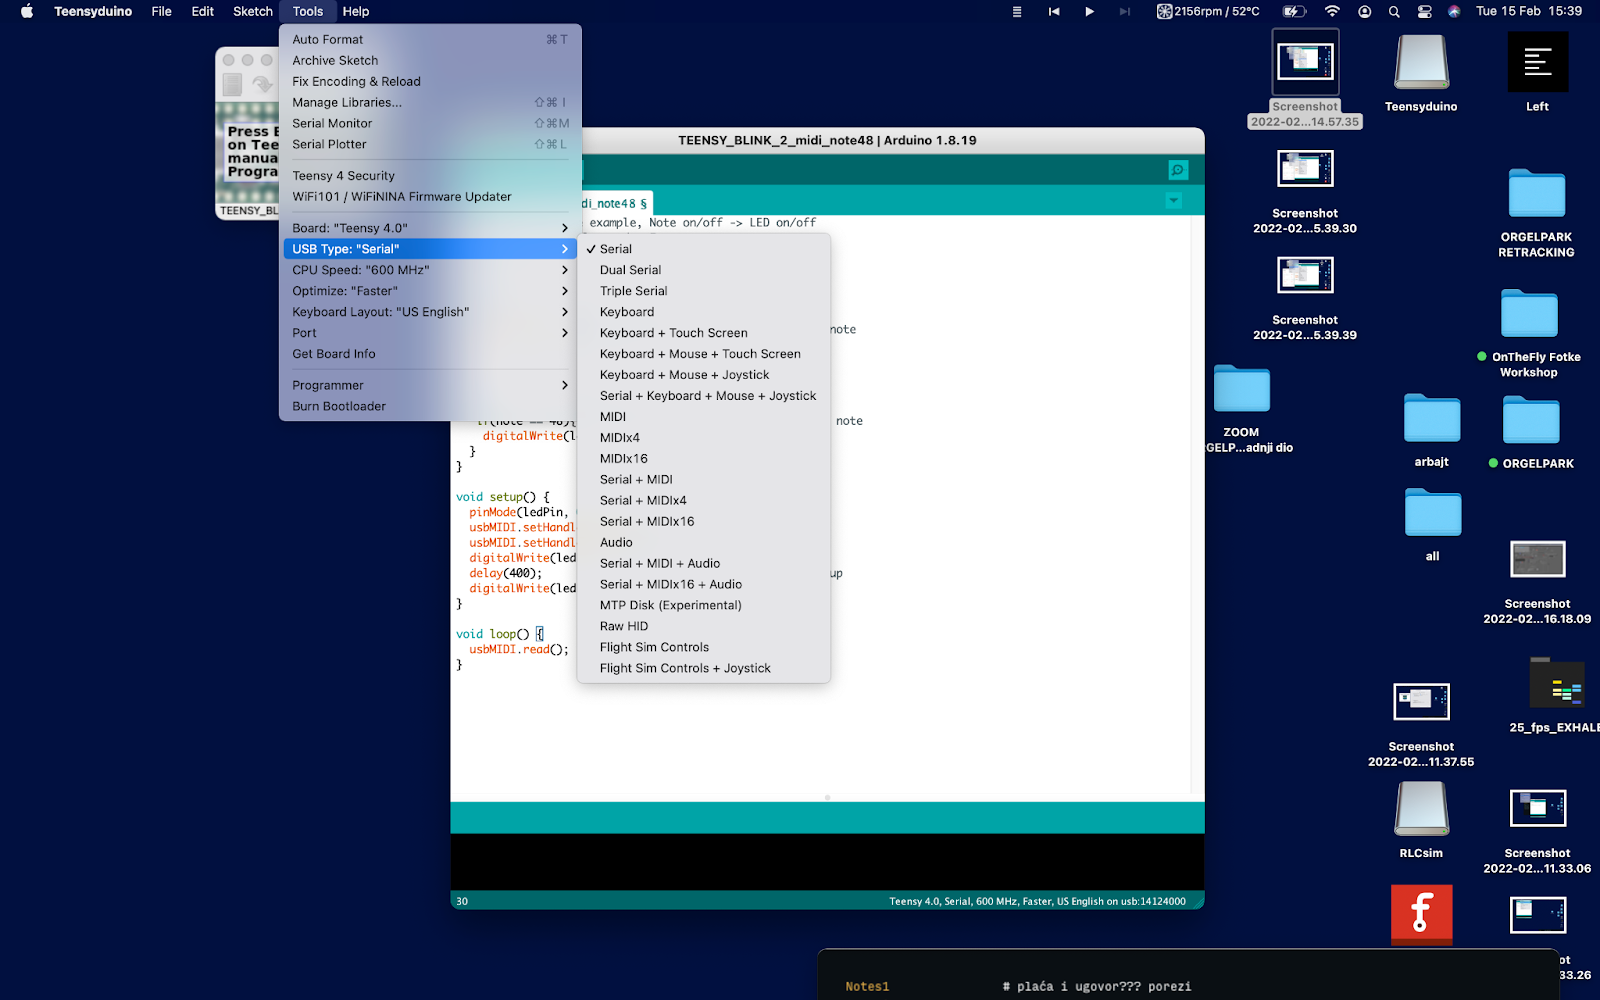
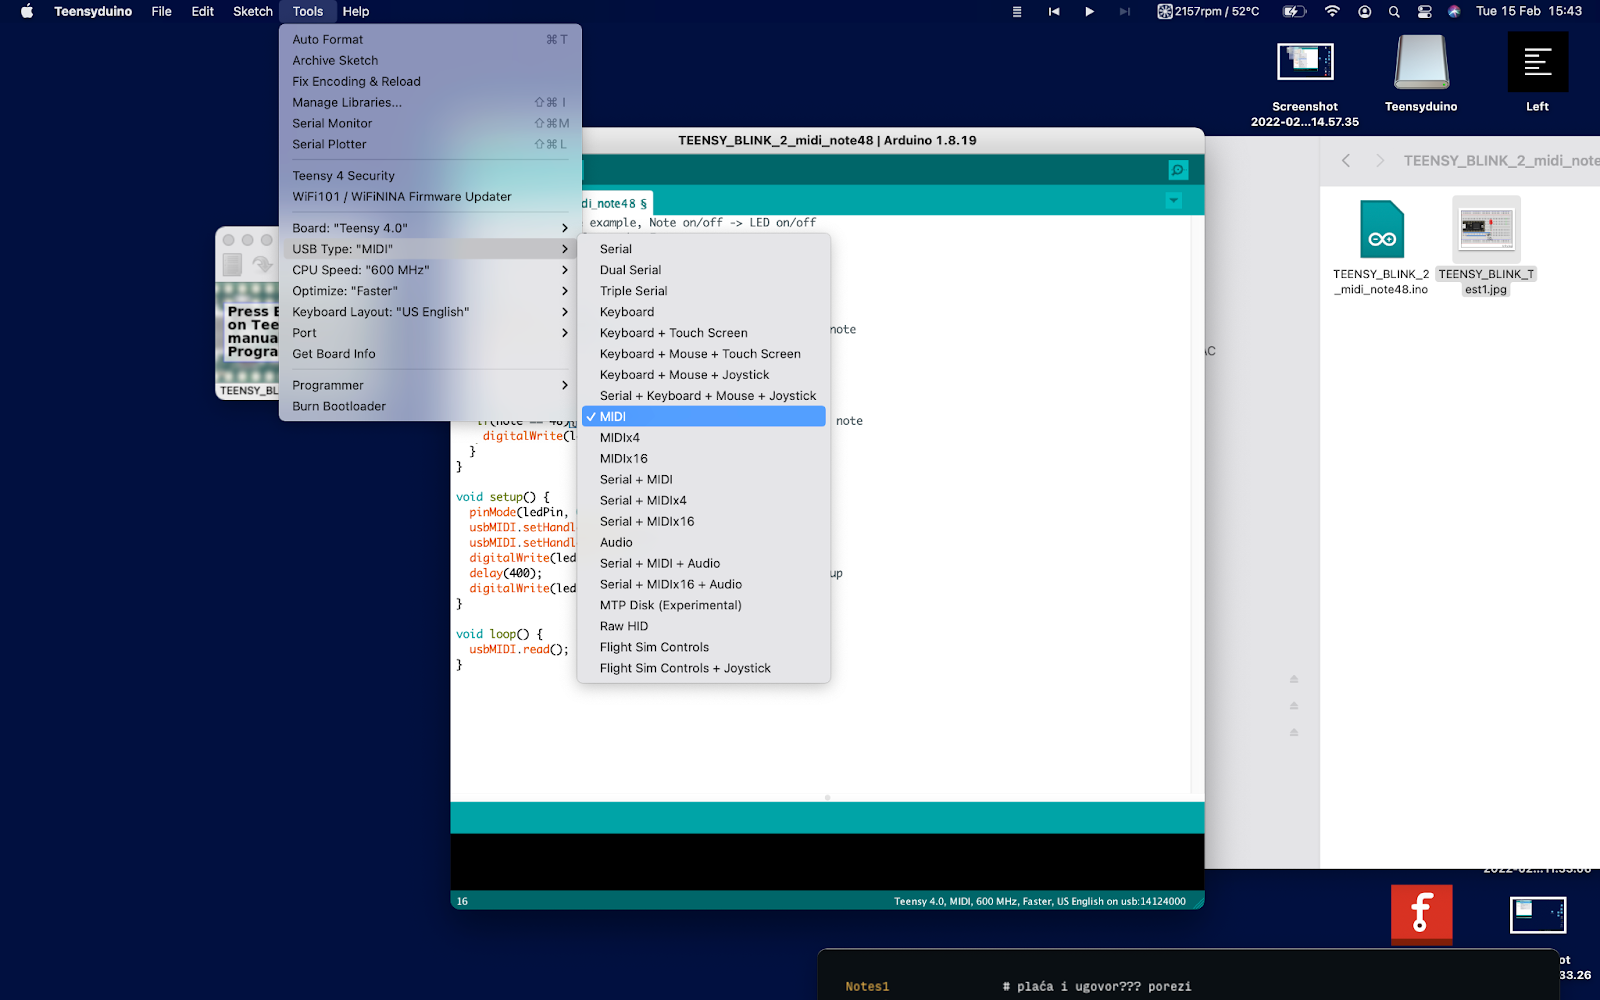
b)Write or Copy/Paste code below in Teensyduino https://github.com/CreativeCodingUtrecht/workshop_AIR_RHYTHM_MACHINE/blob/main/Teensy/TEENSY_BLINK_2_midi_note48/TEENSY_BLINK_2_midi_note48.ino
// USB MIDI receive example, Note on/off -> LED on/off
// contributed by Alessandro Fasan
// modified by bstivic

int ledPin = 1;

void OnNoteOn(byte channel, byte note, byte velocity) {
  if(note == 48){ //note number 48 is represented by C2 note
     digitalWrite(ledPin, HIGH);
  }
}

void OnNoteOff(byte channel, byte note, byte velocity) {
   if(note == 48){ //note number 48 is represented by C2 note
    digitalWrite(ledPin, LOW);
  }
}

void setup() {
  pinMode(ledPin, OUTPUT);
  usbMIDI.setHandleNoteOff(OnNoteOff);
  usbMIDI.setHandleNoteOn(OnNoteOn) ;
  digitalWrite(ledPin, HIGH);
  delay(400);                 // Blink LED once at startup
  digitalWrite(ledPin, LOW);
}

void loop() {
  usbMIDI.read();
}
c) Upload the sketch to Teensy 4.0
d)Test it with Sonic PI or DAW
Select MIDI output teensy_midi as default MIDI device
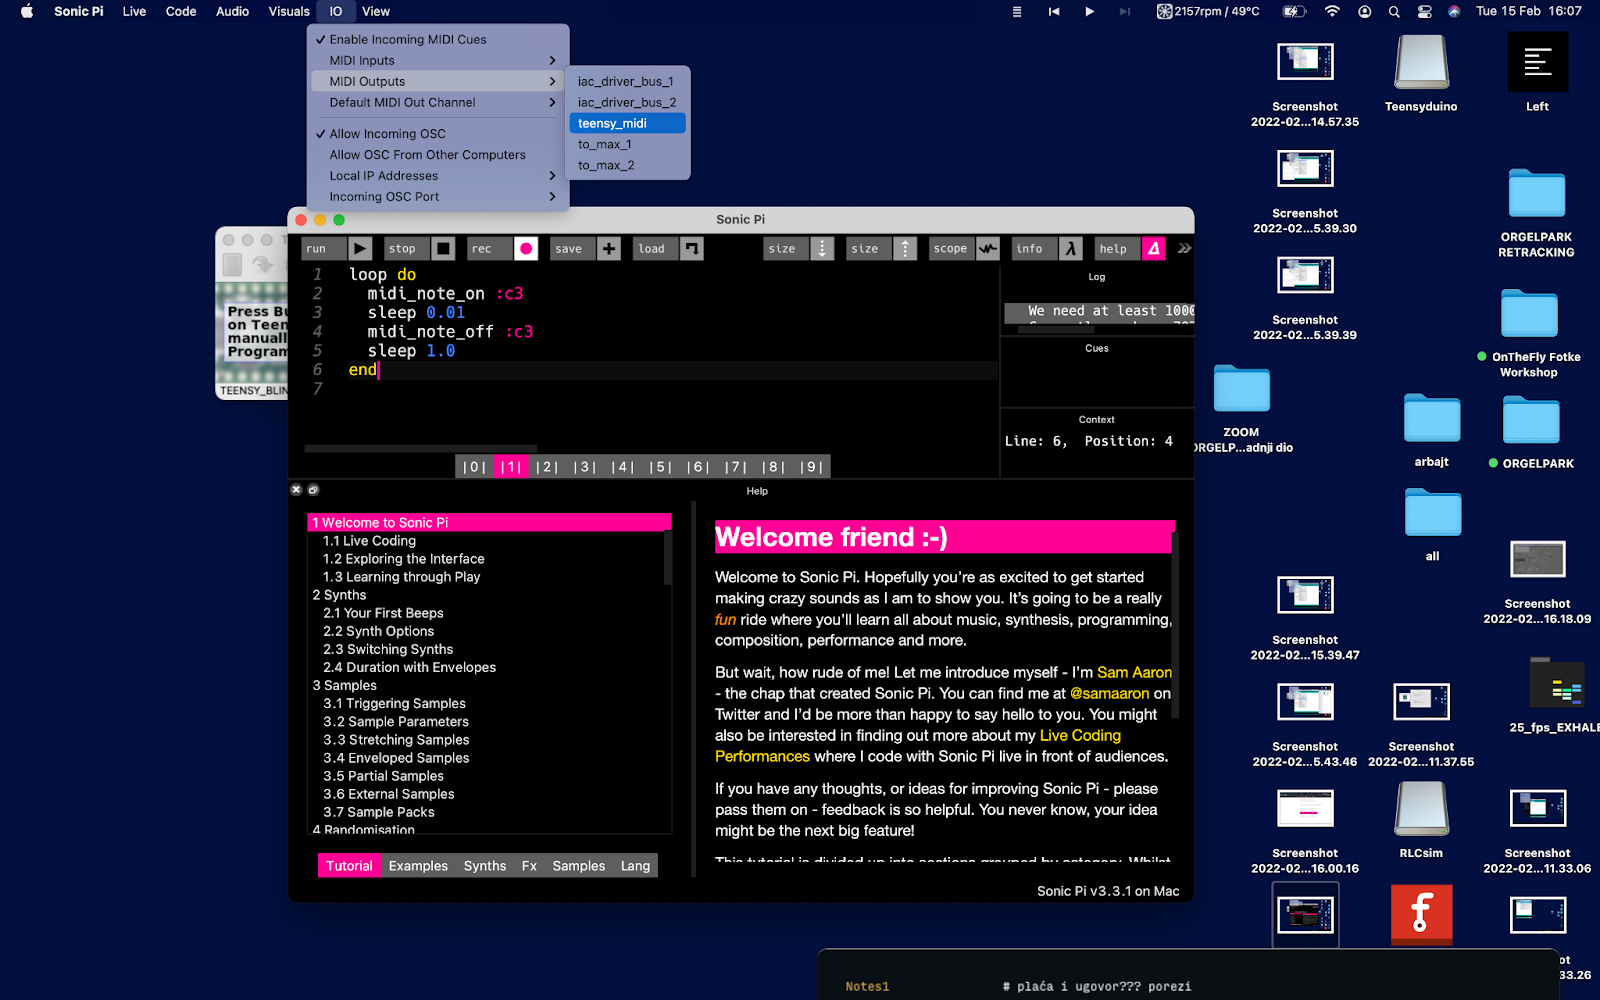
Play midi note C3 (in Sonic Pi C3 is 48, in other DAW’s like Ableton C2 is 48) https://github.com/CreativeCodingUtrecht/workshop_AIR_RHYTHM_MACHINE/blob/main/Sonic%20PI/Sonic_PI_MIDI_test_Note48.rb
  loop do
    midi_note_on :c3  #midi note on 48
      sleep 0.01             #sleep 10 miliseconds
      midi_note_off :c3  #midi note off 48
    sleep 3.0              #sleep 3 seconds
end
a)connecting TIP122 darlington transistor https://components101.com/transistors/tip122-pinout-equivalent-datasheet
b)connecting pneumatic valve
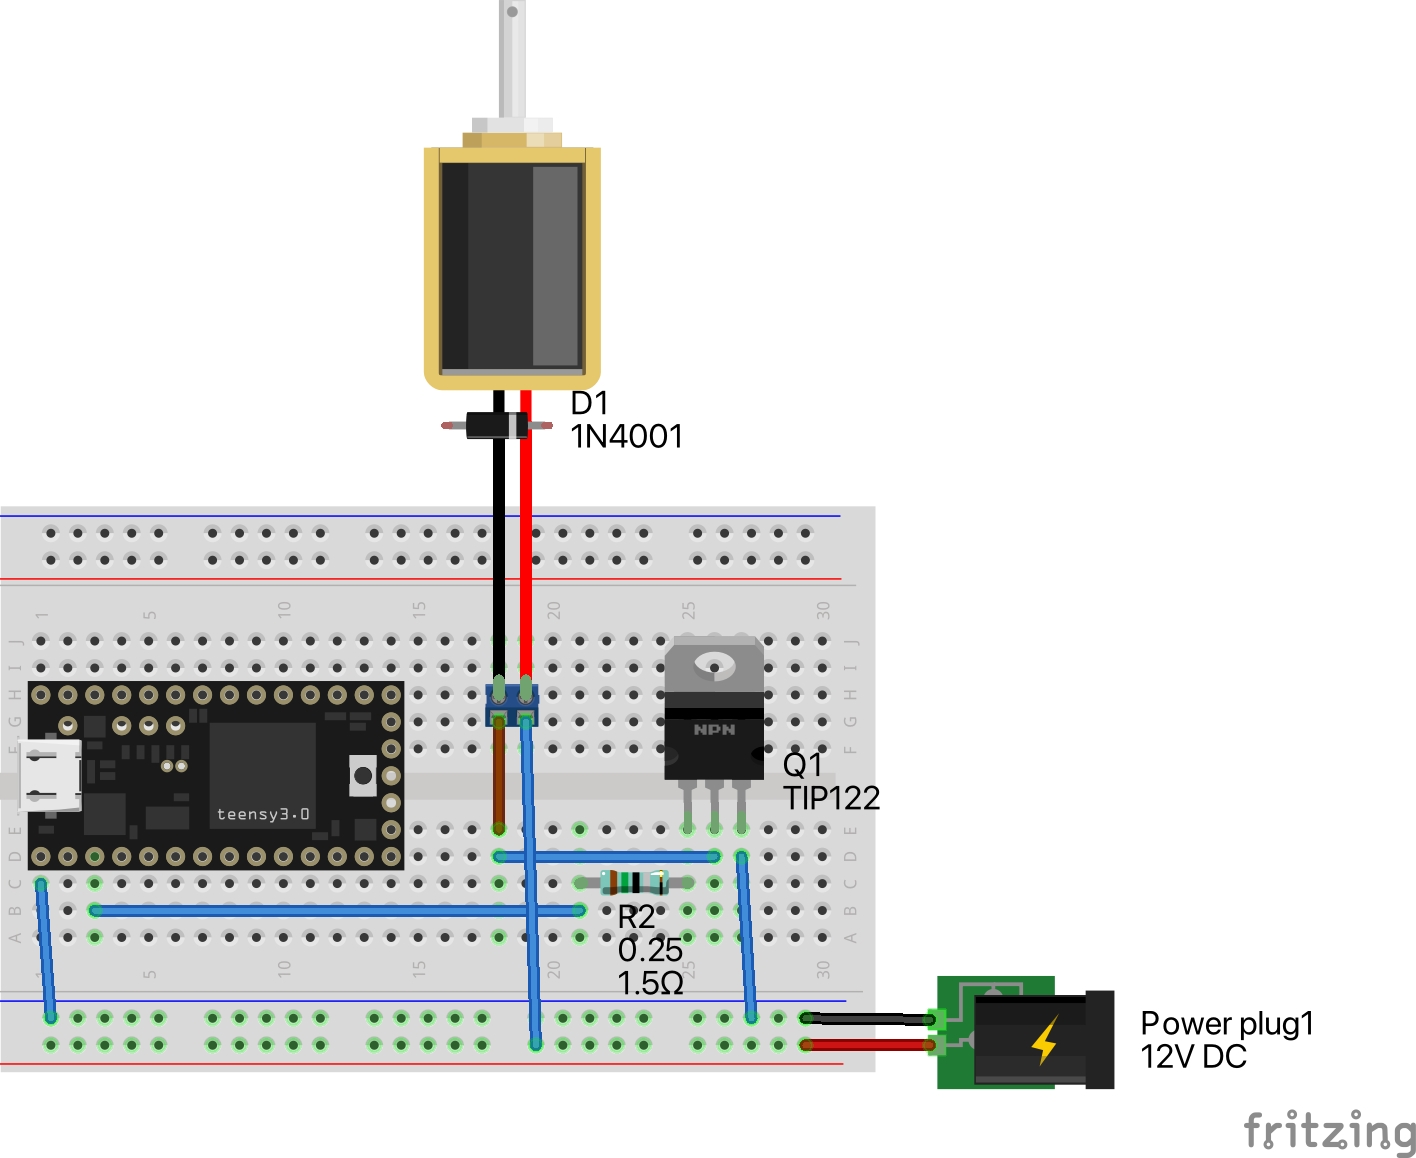
*Connecting flyback diode to solenoid valves is mandatory for circuit protection, but pre soldered for this workshop directly to solenoid valves.