Webwright is more than just a terminal shell—it's a transformative tool that gets things done, plain and simple.
In the early days of computing, the command line was king. Webwright is for the tinkerers and hackers who remember that raw power. It taps into that primal, user-first ethos, acting as a ghost in your shell: an AI that speaks your language and understands your needs.
With Webwright, you're in control. Generate code, manage projects, deploy apps, and automate tasks—all from your terminal. It's the tool that puts power back in your hands.
This is computing at its rawest, most powerful, and most liberating.
Are you ready to unleash the ghost in your shell?
Webwright requires an API token from either OpenAI or Anthropic to function. You can obtain these tokens from:
Please ensure you have at least one of these API keys before proceeding with the installation.
Webwright now supports both local and remote Ollama instances:
- Install Ollama following instructions at https://ollama.ai
- Start the Ollama service
- Webwright will automatically detect and use the local Ollama instance
- Get your substrate.run endpoint URL
- Configure Webwright with your endpoint:
export OLLAMA_API_ENDPOINT="https://your-instance.substrate.run"
- 🌐 AI-Powered Web Development: Craft and launch websites with intelligent, AI-driven tools.
- 💻 Smart Code Generation: Let AI write code for you, boosting productivity and innovation.
- 📊 Effortless Project Management: Seamlessly create and oversee projects with AI assistance.
- 🔄 Integrated Version Control: Push your code to GitHub without leaving the terminal.
- 🐳 Docker at Your Fingertips: Effortlessly spin up and manage Docker containers.
- 🌐 Browser Magic: Automate web tasks and open URLs (or other apps) with simple commands.
- 🔧 Infinitely Extensible: Customize your shell with bespoke commands and scripts.
Webwright requires Anaconda and Docker to be configured on your system.
-
Install Webwright
pip install webwright
-
Set up dependencies
Webwright requires Anaconda and Docker to be configured on your system.
-
Create and activate a Conda environment
conda create -n webwright python=3.8
conda activate webwright
-
Install Git Ensure Git is installed in your Conda environment:
conda install git
-
Start Webwright
webwright
Once installed, you can start using Webwright by simply typing webwright in your terminal. Here's a quick overview of some commands:
open hackernewscreate project my-projectgenerate code --type python --output my_script.pygit commit -m "Initial commit"docker start my-containerWebwright can generate complex code snippets using AI. For example, to generate a fractal:
generate fractal --size 20Here's an example of a Python code snippet generated by Webwright to create a mandlebrot fractal:
import matplotlib.pyplot as plt
import numpy as np

# Function to compute the Mandelbrot set
def mandelbrot(c, max_iter):
    z = c
    for n in range(max_iter):
        if abs(z) > 2:
            return n
        z = z*z + c
    return max_iter

# Generate the fractal
def generate_fractal(size):
    # Determine the plot boundaries
    x_min, x_max = -2.5, 1.5
    y_min, y_max = -2.0, 2.0

    width, height = (size*100, size*100)  # Increase resolution by multiplying size by 100
    x, y = np.linspace(x_min, x_max, width), np.linspace(y_min, y_max, height)
    fractal = np.zeros((width, height))

    for i in range(width):
        for j in range(height):
            fractal[i, j] = mandelbrot(complex(x[i], y[j]), 256)

    plt.imshow(fractal.T, extent=[x_min, x_max, y_min, y_max], cmap='hot')
    plt.colorbar()
    plt.title("Mandelbrot Fractal")
    plt.show()

# Generate a fractal of the given size
generate_fractal(20)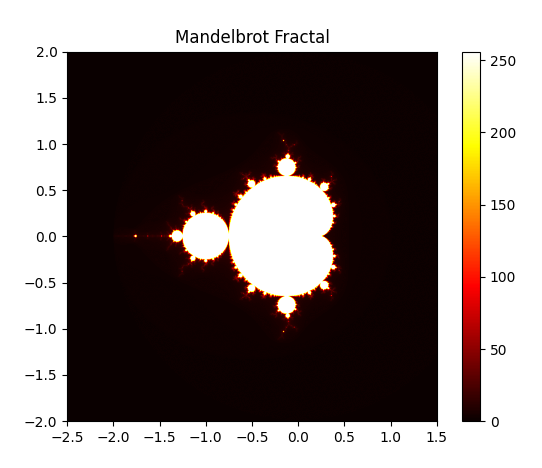
For developers who want to install Webwright for testing, building, and running from source:
-
Clone the Repository
git clone https://github.com/MittaAI/webwright.git cd webwright -
Set up Conda Environment
conda create -n webwright python=3.10
conda activate webwright
-
Install Dependencies
pip install -r requirements.txt --no-deps -U chroma-hnswlib==0.7.3
-
Install Git (if not already installed)
conda install git
-
Add GITHUB_TOKEN to Environment
$env:GITHUB_TOKEN = "your_github_token"
-
Run Webwright from Source
python webwright/main.py
If you are using VSCode and need to get conda working in the editor, you might need to run the following command from the condabin directory:
./conda init powershell
This will set up the necessary configuration for conda to work properly within VSCode terminal sessions.
To build and test Webwright:
- Install Development Dependencies Install all dependencies except chroma-hnswlib (current version has issues)
pip install -r <(grep -v chroma-hnswlib requirements.txt)
Install the specific version of chroma-hnswlib
pip install --no-deps chroma-hnswlib==0.7.3
Install remaining dependencies
pip install -r requirements.txt
- Run Tests
pytest
NOT WORKING.
- Build Package
python setup.py sdist bdist_wheel
If you're planning to contribute to Webwright, make sure to set up your Git environment:
-
Configure Git
git config --global user.name "Your Name"
git config --global user.email "[email protected]"
-
Create a New Branch for Your Changes
git checkout -b feature/your-feature-name
-
Make Your Changes and Commit
git add .
git commit -m "Description of your changes"
-
Push Your Changes and Create a Pull Request
git push origin feature/your-feature-name
Then, go to the GitHub repository and create a pull request for your branch.
Remember to always pull the latest changes from the main branch before starting your work:
git checkout main
git pull origin main
For more detailed contribution guidelines, please refer to our CONTRIBUTING.md file.
For detailed usage instructions and examples, visit the Webwright Documentation.
Webwright is an open-source project. We welcome contributions!
Join our community on Slack for support, discussions, and to share your ideas and feedback.
Webwright is open-source software licensed under the MIT License.
© Mitta Corp. All rights reserved 2024.