Telly is an interactive whiteboard and note-taking app designed to enhance learning, boost productivity, and foster collaboration. This app leverages AI to solve math expressions and provide detailed explanations, making it an ideal tool for students, teachers, and professionals. Auth0 is used to manage secure user authentication.
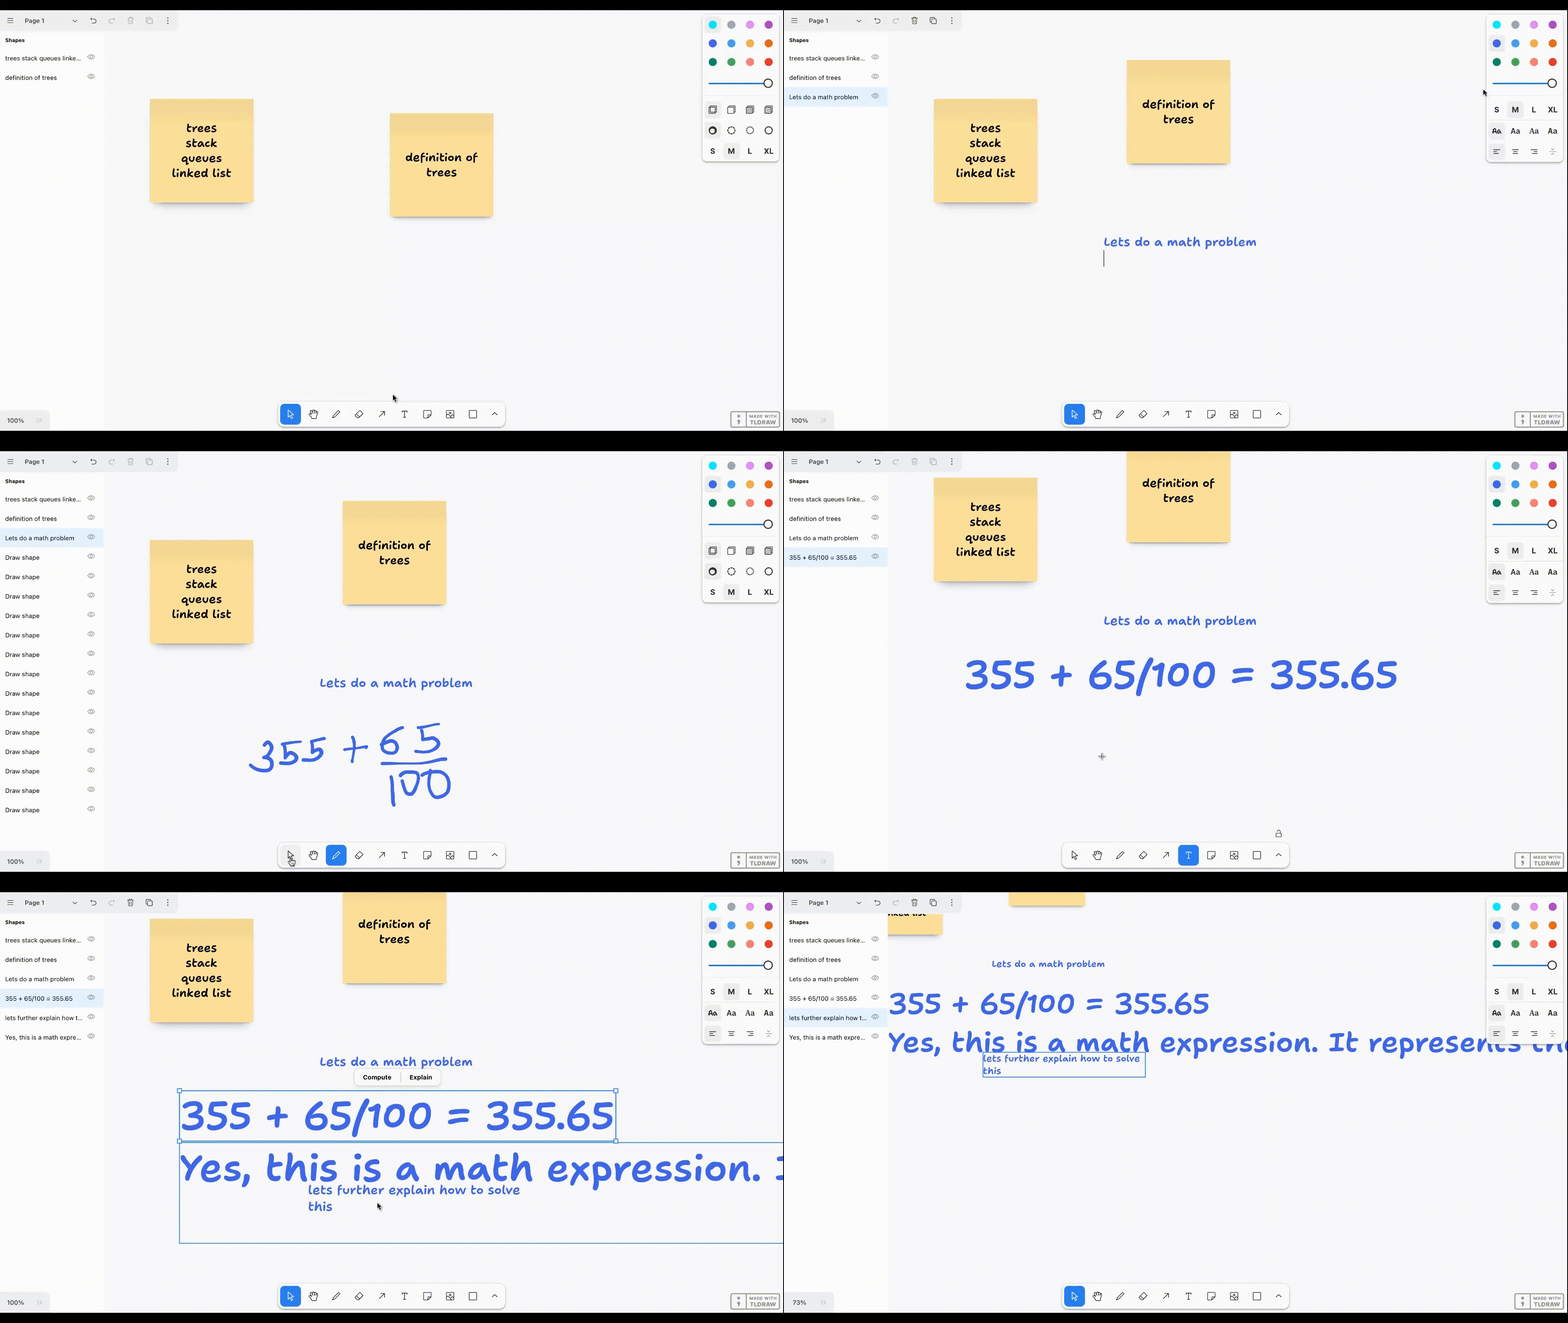
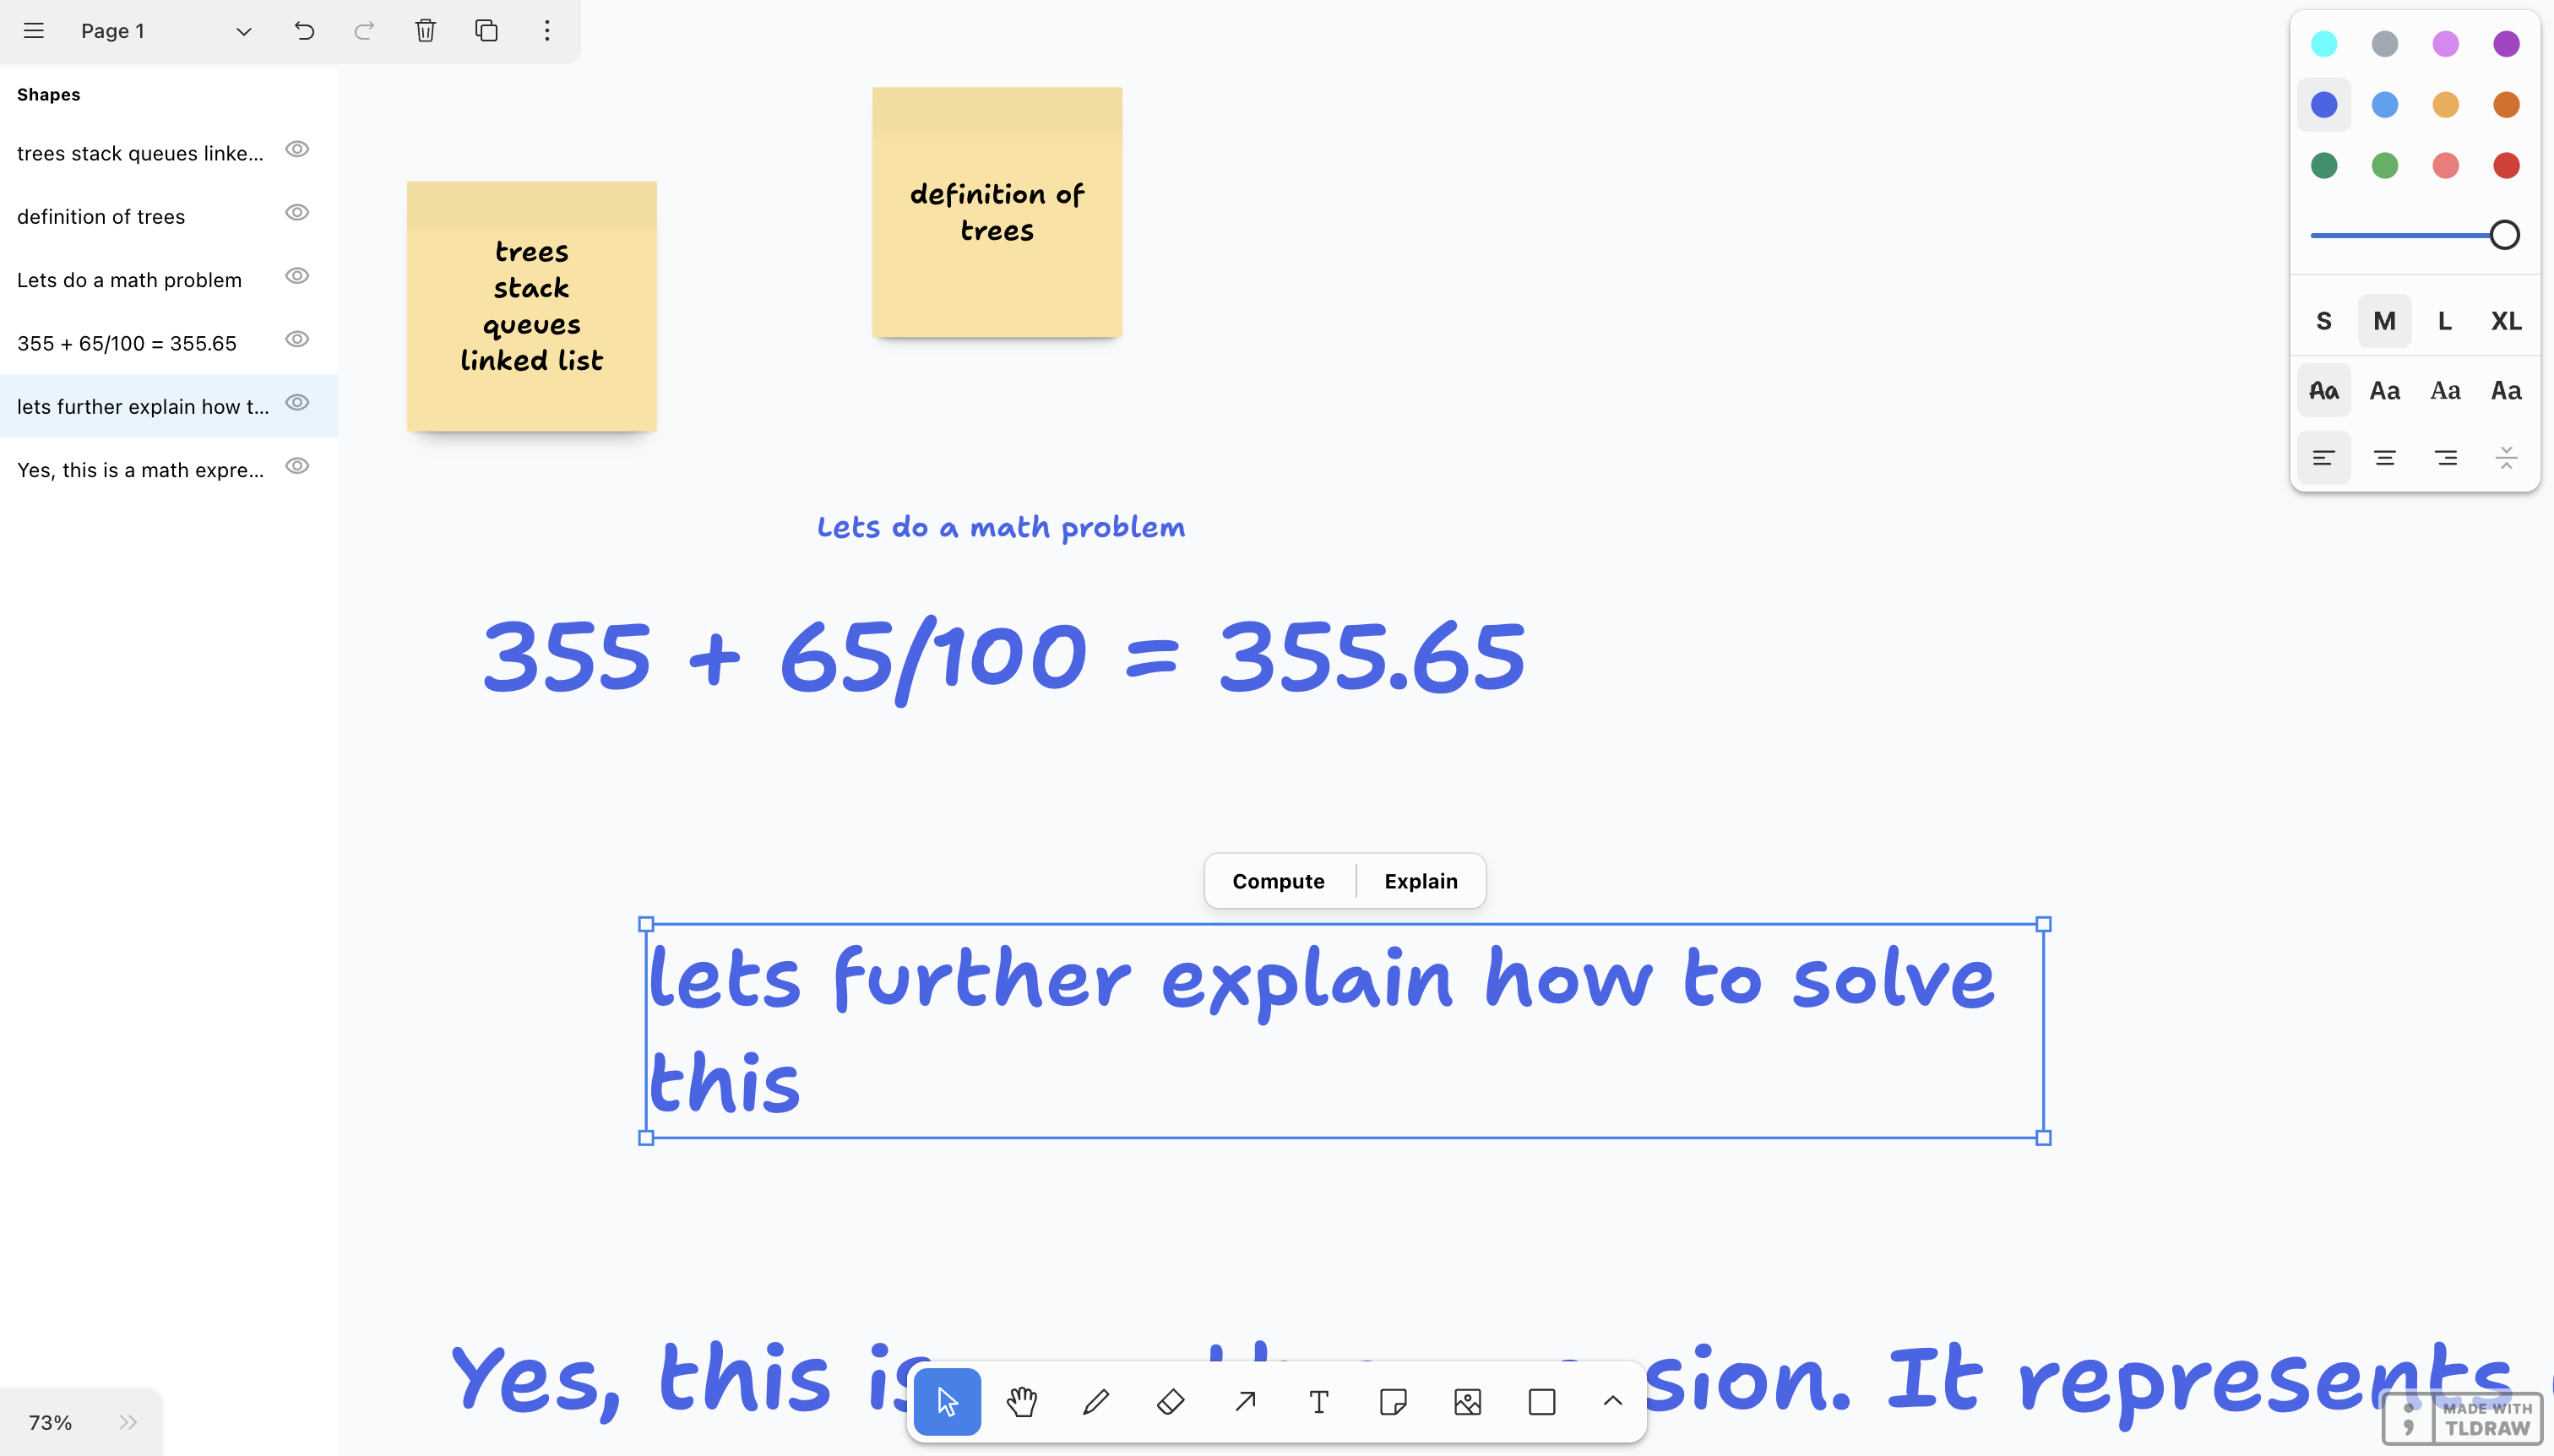
- Interactive Whiteboard: Draw, annotate, and visually organize ideas in real time.
- Note-taking: Save notes, collaborate, and revisit information quickly.
- AI-Powered Math Solver: Calculate and explain math expressions to enhance understanding.
- Secure Authentication: Auth0 integration for secure user login and management.
- Real-time Collaboration: Collaborate with others on shared boards and notes.
Follow these instructions to set up and run the application on your local machine.
- Node.js (version 14 or higher recommended)
- NPM or Yarn
- An Auth0 account (for authentication setup)
- Tldraw
Follow these steps to set up and run the Telly application on your local machine.
To get started, you'll need a copy of the Telly project files on your local machine. You can do this by cloning the repository from GitHub.
-
Open your terminal (Command Prompt, Git Bash, or any terminal of your choice).
-
Run the following commands:
git clone https://github.com/your-username/telly-app.git cd telly-app- The
git clonecommand downloads the repository to your local machine. - The
cd telly-appcommand navigates into the project directory.
- The
Note: Replace
your-usernamewith your GitHub username or the repository owner's username if you're using someone else’s repository.
At this point, you now have a local copy of the project files, and you’re inside the project directory, ready to install dependencies.
With the repository cloned, the next step is to install the required dependencies. This can be done using NPM or Yarn.
For NPM:
npm installFor Yarn:
yarn installThis command will install all necessary packages listed in the package.json file.
The application requires environment variables for configuration, which you should add in a .env file.
-
Create a
.envfile in the root of your project directory. -
Add your Auth0 credentials to the
.envfile as follows:REACT_APP_AUTH_DOMAIN="your-auth0-domain" REACT_APP_AUTH_CLIENT_ID="your-auth0-client-id"
- Replace
"your-auth0-domain"with your Auth0 domain (e.g.,dev-4nnotbpus.au.auth0.com). - Replace
"your-auth0-client-id"with your Auth0 client ID.
- Replace
Note: You can find these values in the Auth0 dashboard under Applications > Applications for your specific app.
Now you’re ready to start the development server.
For NPM:
npm startFor Yarn:
yarn startThis command starts the application in development mode, and you should see it open automatically in your browser at http://localhost:3000. If it doesn’t open automatically, you can navigate to this URL manually.
To verify that your environment variables are loaded correctly, you can add a temporary console.log statement in your code:
   console.log("Auth Domain:", process.env.REACT_APP_AUTH_DOMAIN);
   console.log("Auth Client ID:", process.env.REACT_APP_AUTH_CLIENT_ID);
Run the app, open the browser's developer console, and you should see the values you set in .env printed in the console.
If you want to create an optimized build of the app for production, you can use the following command:
For NPM:
npm run buildFor Yarn:
yarn buildThis command generates an optimized build in the build folder, ready for deployment.
- Environment Variables Not Loading: Ensure the
.envfile is in the root directory and restart the server if you make changes. - Authentication Issues: Double-check your Auth0 domain and client ID to ensure they match the values from your Auth0 dashboard.
Following these steps, you should now have the Telly application up and running on your local machine!