This provides instructions on how to set up and run a web-based distance display system using an ESP32 microcontroller and an ultrasonic sensor.
Active since: September 2024
Account From: September 2020
- Overview
- Components Required
- Setup Instructions
- Code Explanation
- How to Run the Project
- Troubleshooting
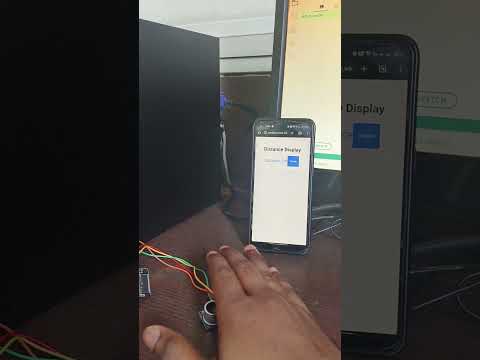
This project allows you to measure and display the distance measured by an ultrasonic sensor on a web page. The ESP32 microcontroller hosts a web server that responds to HTTP requests with the distance data.
For more details, you can watch the video on YouTube.
- ESP32 Development Board
- HC-SR04 Ultrasonic Sensor
- USB cable for programming the ESP32
- Jumper wires
- Breadboard (optional)
-
Wiring the Ultrasonic Sensor:
- Connect the VCC pin of the HC-SR04 to the 5V pin of the ESP32.
- Connect the GND pin of the HC-SR04 to the GND pin of the ESP32.
- Connect the TRIG pin of the HC-SR04 to GPIO 12 of the ESP32.
- Connect the ECHO pin of the HC-SR04 to GPIO 14 of the ESP32.
-
Install the Arduino IDE:
- Download and install the Arduino IDE from Arduino's official website.
-
Install ESP32 Board Support:
- In Arduino IDE, go to File > Preferences and add the following URL to the "Additional Board Manager URLs" field:
https://dl.espressif.com/dl/package_esp32_index.json - Then, go to Tools > Board > Boards Manager, search for "ESP32" and install it.
- In Arduino IDE, go to File > Preferences and add the following URL to the "Additional Board Manager URLs" field:
-
Upload the Code:
- Open the Arduino IDE and create a new sketch.
- Copy and paste the provided
.inocode (see Code Explanation). - Replace the
WiFi.begin("vivo", "Aadesh123");line with your Wi-Fi SSID and password. - Connect the ESP32 to your computer and select the correct board and port in the Arduino IDE.
- Click on the upload button to upload the code to the ESP32.
The HTML code creates a simple web page that fetches and displays the distance from the ESP32 server.
-
Structure:
- A container to hold the title and distance display.
- A button to refresh the distance.
-
JavaScript:
- Fetches the distance from the server at
http://192.168.189.217/distance. - Automatically refreshes every 2 seconds.
- Fetches the distance from the server at
The Arduino code does the following:
-
Includes Libraries:
- Includes libraries for Wi-Fi connectivity and web server functionality.
-
Defines Pins:
TRIG_PINis set to 12 andECHO_PINis set to 14.
-
Setup Function:
- Initializes the serial communication.
- Connects to the specified Wi-Fi network.
- Sets up an HTTP route to handle distance requests.
-
Loop Function:
- Continuously measures the distance and handles incoming client requests.
- Sends the distance as a JSON response when a request is received.
- After uploading the code, open the Serial Monitor in the Arduino IDE.
- Note the IP address assigned to your ESP32 (displayed in the Serial Monitor).
- Open a web browser and enter the ESP32's IP address followed by
/distance, e.g.,http://192.168.189.217/distance. - The distance measured by the ultrasonic sensor will be displayed on the web page.
-
ESP32 Not Connecting to Wi-Fi:
- Ensure that the SSID and password are correct.
- Check the Wi-Fi signal strength and try to move the ESP32 closer to the router.
-
Distance Not Displaying:
- Verify that the ultrasonic sensor is correctly wired.
- Ensure the ESP32 code is uploaded successfully.
-
Web Page Not Loading:
- Confirm the correct IP address is being used.
- Make sure the ESP32 is connected to the same network as your computer.
Feel free to reach out if you have any questions or need further assistance!