![]()
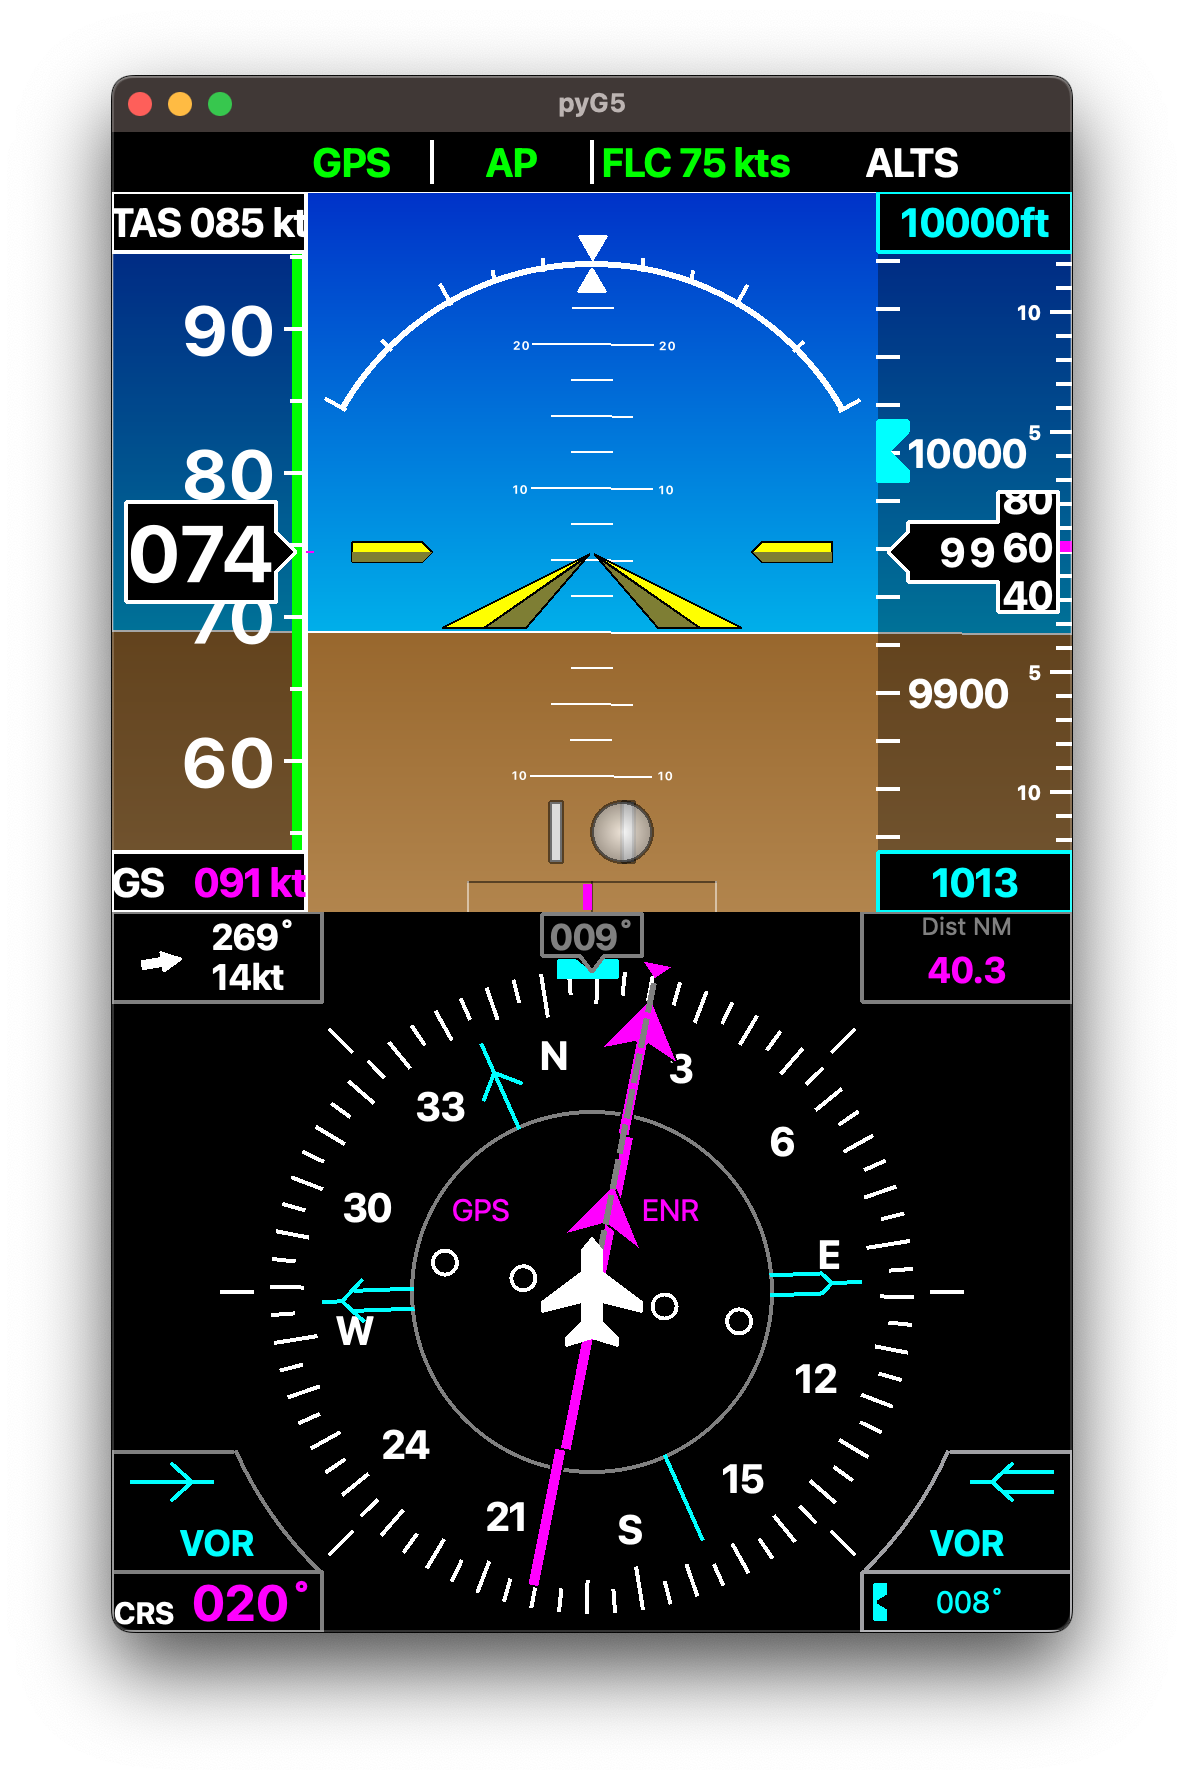
This project aims at development a Garmin G5 view targeting a Raspberry Pi 7 inches display (640x480) . The intent is to provide a G5 Attitude indicator + G5 Horizontal Situation Indicator stacked on the display in vertical mode. The pyG5 connects to X-Plane flight simulator.
It does not require any plugin and use the standard DREF UDP interface from X-Plane. It should not require any configuration. Start it and it will connect to X-Plane and fetch the required data.
This is currently developed on macOS with python 3.9 and testing on a Raspberry Pi 4 with Raspberry Pi OS and an official 7 inches display in vertical mode.
Below is a view of the user interface.
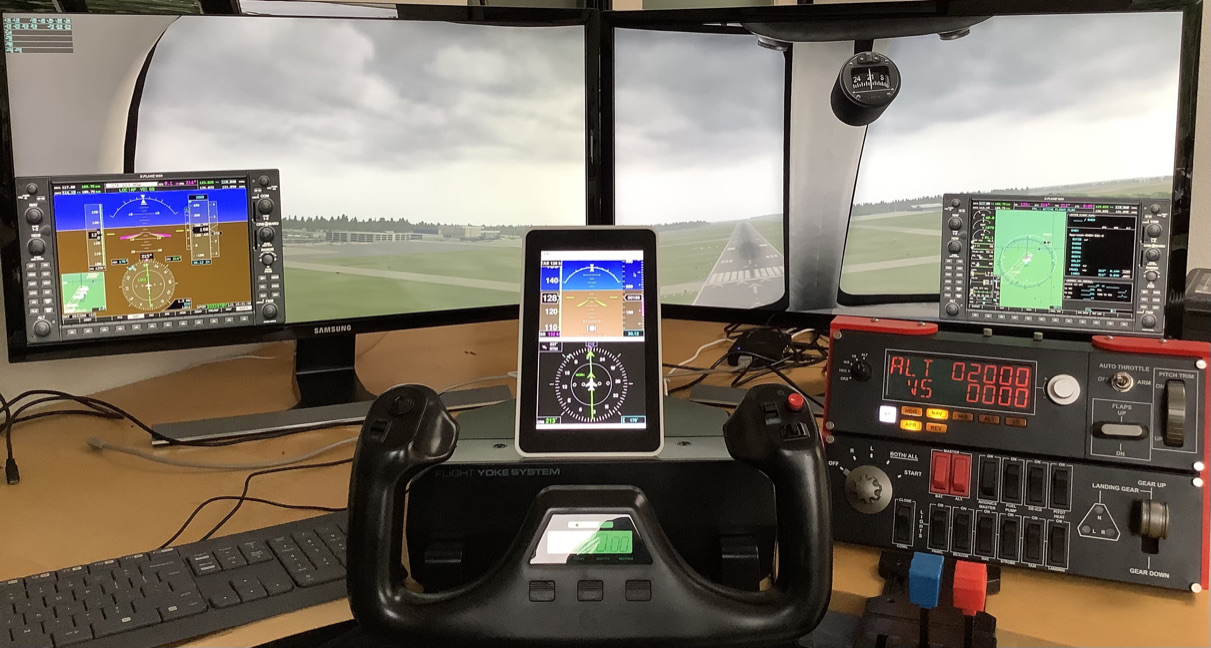
And you can see it in its simulation environment
It's currently in pretty early phase. It's functional and should be easy to install but might suffer from issues here and there.
Not all the features of the G5 are implemented. It's currently missing:
- Glide scope
- lateral guidance on the AI
- Distance to next way point on the Horizontal Situation Indicator.
pyG5 depends on PyQt5. Due to failure to install PyQt5 from pip on Raspberry Pi OS it is not
a dependency of the pyG5. As a result it needs to be installed manually.
Raspberry Pi OS:
> sudo apt-get install python3-pyqt5other OS:
> sudo pip3 install PyQt5The install PyG5:
> sudo pip3 install pyG5 > pyG5DualStackedRunning on Raspberry Pi it is recommended to install FreeSans fonts in order to be consistent with the rendering on the current main development platform, ie. macOS. Most liked this is solved with:
> sudo apt-get install libfreetype6If you intend to develop based on this project. At a glance:
- The application runs on PyQt5 event loop.
- It's loosely implementing a Model View Controller coding style
- The
pyG5Networkcontains X-Plane network interface is monitoring the connection and feed data at 30Hz to a slot - The view is repainting the interface every time the data is received from the network interface
- The
pyG5Widgetis derived twice into and Horizontal Situation Indicator and an AI. thepyG5DualStackinstantiate both into a single widget. That means it's easy to build the view with just one of them. - The
pyG5Mainmodule contains the application and the main window class.
Clone the repository
> git clone Initialize the virtual environment
> source bootstrap.shStart the Application
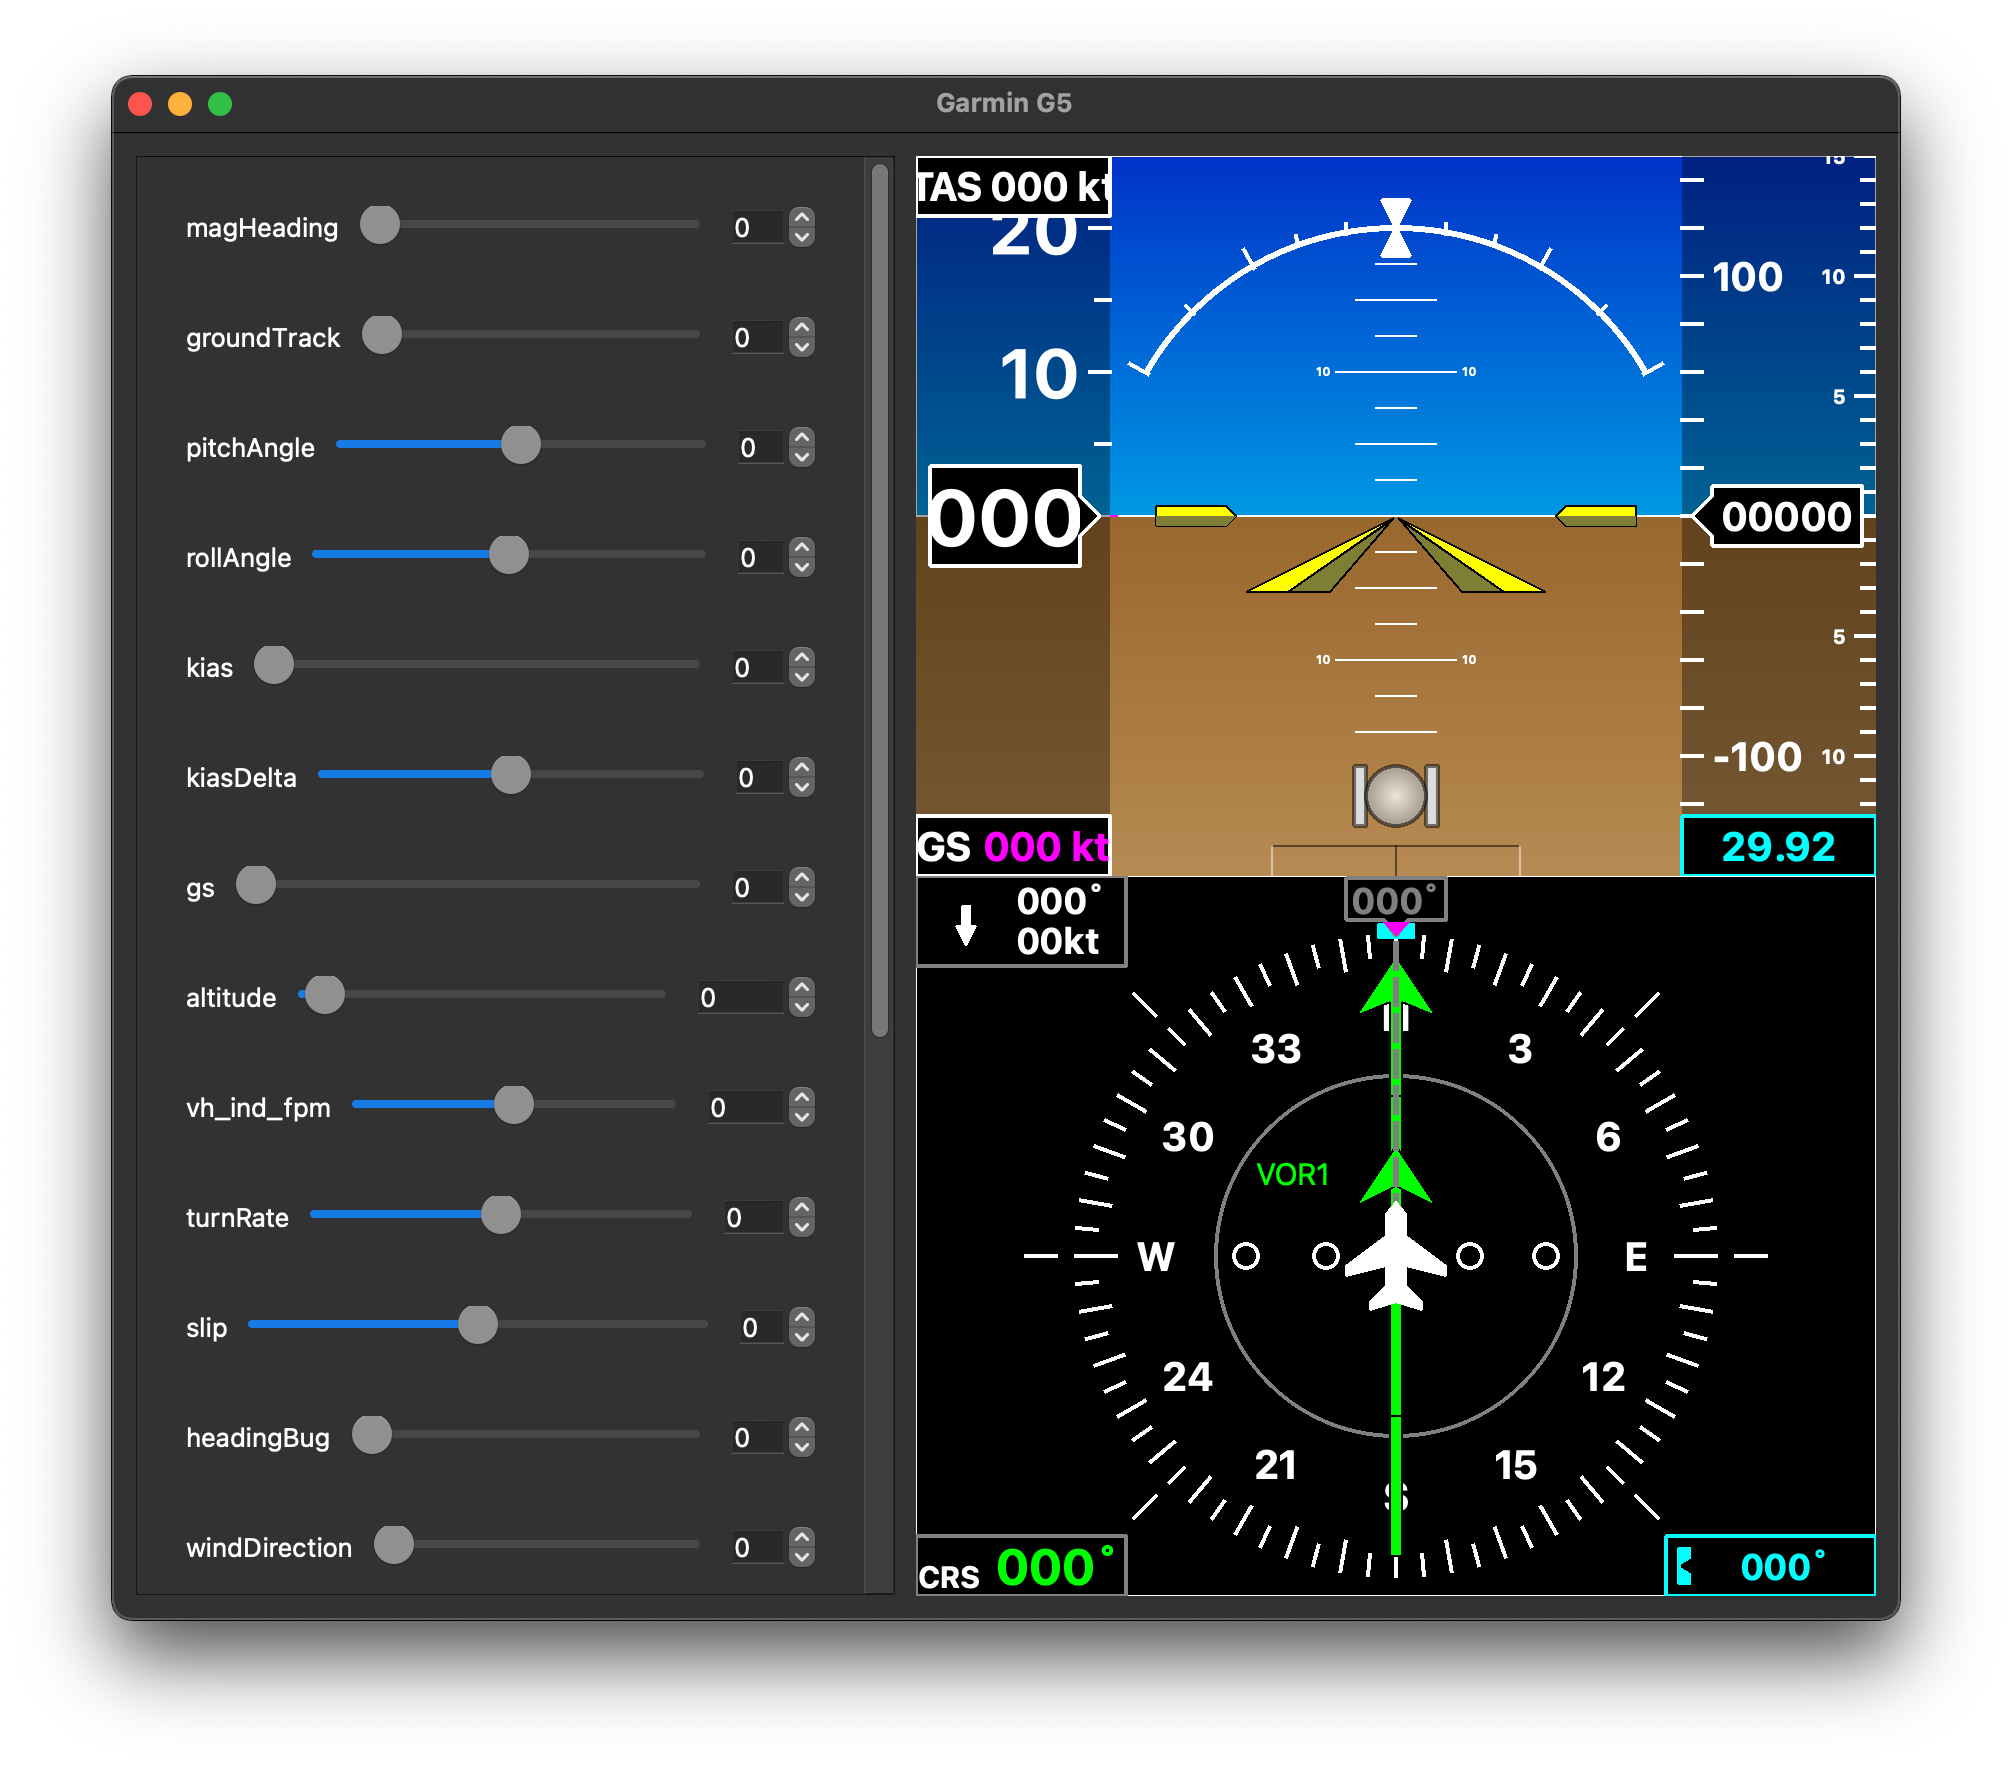
> python -m pyG5.pyG5MainIn order to evaluate the design without X-Plane running you can use:
> python -m pyG5.pyG5ViewTesterThis will feed the data from the sliders in the UI instead of the X-Plane network interface:
attitude_ind_widget.py is the only addition in this forked repo. It was used as an attitude indicator widget in the Ground Control Station being developed for Unmanned Aircraft Systems. The overall GCS is being built using PyQt5 as well. The parameters are being passed to the constructor method of "pyG5AIWidget" from a separate file (example included below).
Instead of including a logging functionality, pyG5AIWidget in attitude_ind_widget.py simply acts as a class with a method to draw the indicator. For my project, I am passing the values to class attrributes as:
- self.hud = pyG5AIWidget()
- self.hud.roll_angle = 30
- self.hud_pitch_angle = -10
- .
- .
- self.hud.mode = 1
Also, PyQt's QPainter has a method repaint() that can draw the whole screen with new data every time it's called. So, after passing the values, I simply call:
- self.hud.repaint()
The differences from original pyG5AIWidget:
- Removed turn co-ordinator
- Removed indicators for set airspeed and set altitude
- Added flight mode, GNSS fix, and arm state status display (available from MAVLink Protocol)
- Removed logging feature from pyG5.py and created class attributes to receive data from another file
From my experience, this attitude indicator works great as a substitute for Mission Planner and QGroundControl if you are building your custom ground station for UAVs. All the parameters are available through mavlink packets, so it should be fairly standard. It'll need a bit of work on creating a framework to receive Mavlink data, store it in a database, pull required data into frontend, and finally pass them to our Attitude Indicator Widget.