
这一步很简单,可参考此文章的【1 appnium 安装】【2 安装驱动】部分,最后用 appium-doctor 查看搭建是否 ok 就行了。
注:我用的 appnium 是 1.18.0-beta.0 版本,python 是 3.8.3 64位版本。
1. 安装 Xcode
我的是 Version 11.6 beta ,下载地址 https://developer.apple.com/download/more/
2. 找到 appnium WebDriverAgent 所在目录
- 终端 cd 到 /Applications/Appium.app/Contents/Resources/app/node_modules/appium/node_modules/appium-webdriveragent 运行
sh ./Scripts/bootstrap.sh - 用 Xcode 打开 /Applications/Appium.app/Contents/Resources/app/node_modules/appium/node_modules/appium-webdriveragent 下的文件 WebDriverAgent.xcodeproj
3. Xcode 连接手机
有线连接直接插数据线
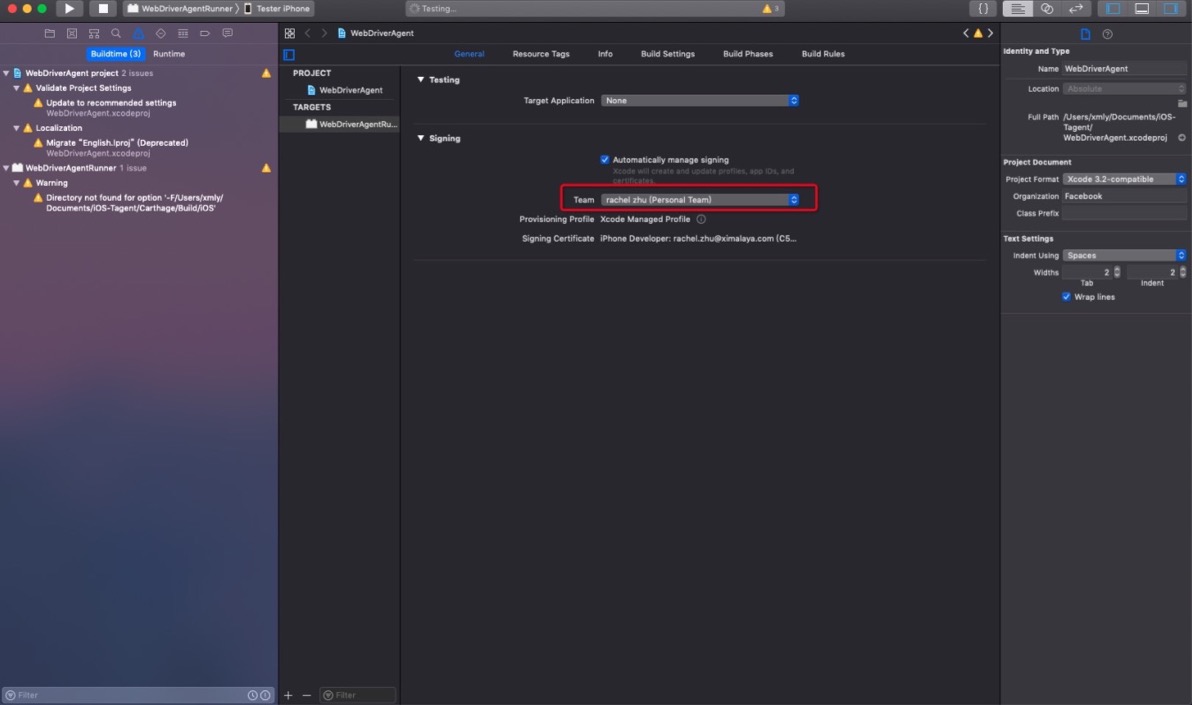
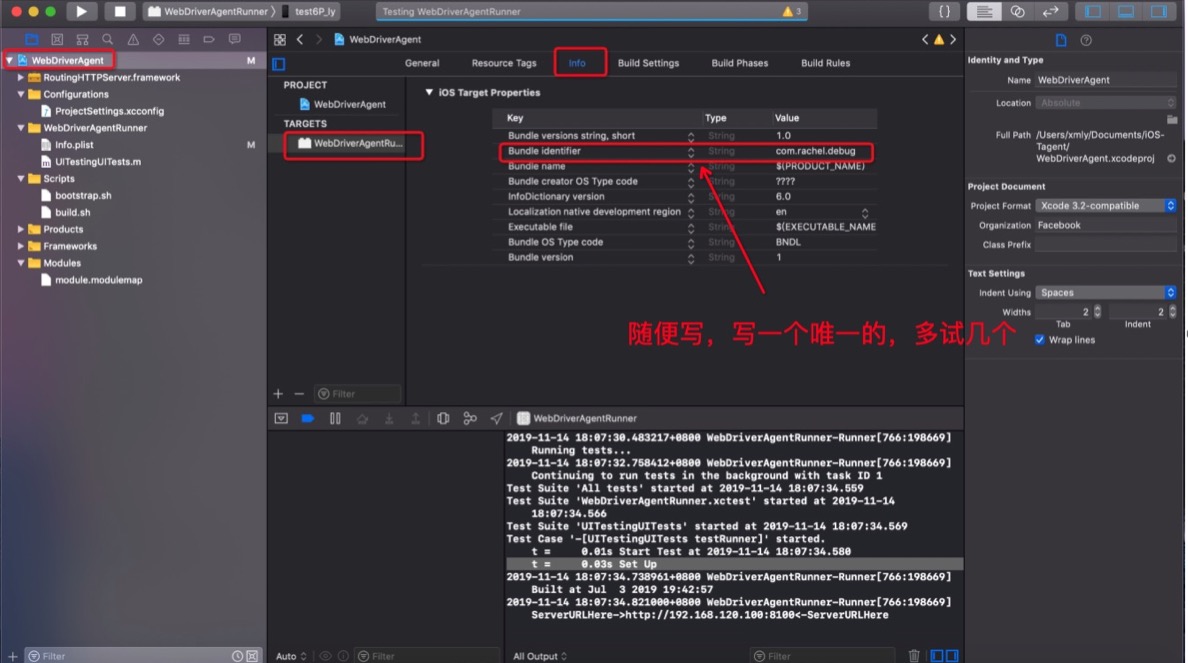
4. 配置 Xcode(重要!!!)
由于我们没有开发者账号,可以先用自己的 apple 账号,但是有连接真机个数(貌似是 3 个)限制。
按照下面3张图配置下图中的 WebDriverAgentRunner 和 WebRunnerAgentLib 。

5、手机安装驱动
选中 WebDriverAgentRunner 和测试机,点击 Product-Test,安装驱动。手机上需要信任该驱动。
运行 iproxy 8100 8100,通过访问 http://localhost:8100/status 可确认WDA是否运行成功。
注:5、6步有疑问可参考 https://testerhome.com/topics/7220
1、以 appium 官方测试 demo 为例,打开项目,选择模拟器,点击下图箭头 build 起来即可。
另外,需要获取到你的 .app 文件路径以供测试代码里使用(如我的是Users/xxxx/Library/Developer/Xcode/DerivedData/TestApp-dnlcmpeeuewymkcljdldzrnrbduz/Build/Products/Debug-iphonesimulator/TestApp.app)。


2、模拟器运行 xxxx
找开发要包;也可考虑支持 jenkins 打模拟器包。
可参考我的配置(真机)
{
  "platformName": "iOS",
  "platformVersion": "12.4.4",
  "deviceName": "iPhone 6",
  "automationName ": "XCUITest",
  "udid": "6027272dcff3571a8c89ad0b5dcb200db6ac98ff",
  "bundleId": "com.xxxx"
}

UDID xcode 上有,也可以通过蒲公英查。 bundleId 用 ideviceinstaller -l 查,若 ideviceinstaller -l 失败解决方案 https://www.cnblogs.com/lily-20141202/p/10404377.html
模拟器配置可参考:
{
  "platformName": "iOS",
  "platformVersion": "12.4",
  "deviceName": "iPhone 6",
  "automationName": "XCUITest",
  "app": "/Users/xxxx/Library/Developer/Xcode/DerivedData/TestApp-dnlcmpeeuewymkcljdldzrnrbduz/Build/Products/Debug-iphonesimulator/TestApp.app"
}
1、官网安装 idea
2、idea破解方法 https://www.algerfan.cn/articles/2019/03/06/1551868940012.html
3、按照四中的真机及模拟器启动app配置,用 java 编写启动代码

注意点: 1:启动的时候 appium 要 start server
2:报 Keyboard is not present,模拟器不能唤起键盘
- Open your Simulator
- Select Hardware
- Select 'Connect Software Keyboard’
3:关于 testng 学习网站 http://www.testclass.net/testng/data-provider
1、pom.xml 添加依赖
<dependency>
    <groupId>io.qameta.allure</groupId>
    <artifactId>allure-testng</artifactId>
    <version>2.0-BETA3</version>
</dependency>
2、直接运行 testng.xml 文件,会自动生成 allure-results 文件夹
3、查看报告
方式1 生成报告,查看 index.html
allure generate 用于生成allure的源文件 -o 生成allure报告的目录
方式2 直接启动服务并打开测试报告
allure serve 用于生成allure的源文件所在目录

更多使用参考官方文档:https://docs.qameta.io/allure/