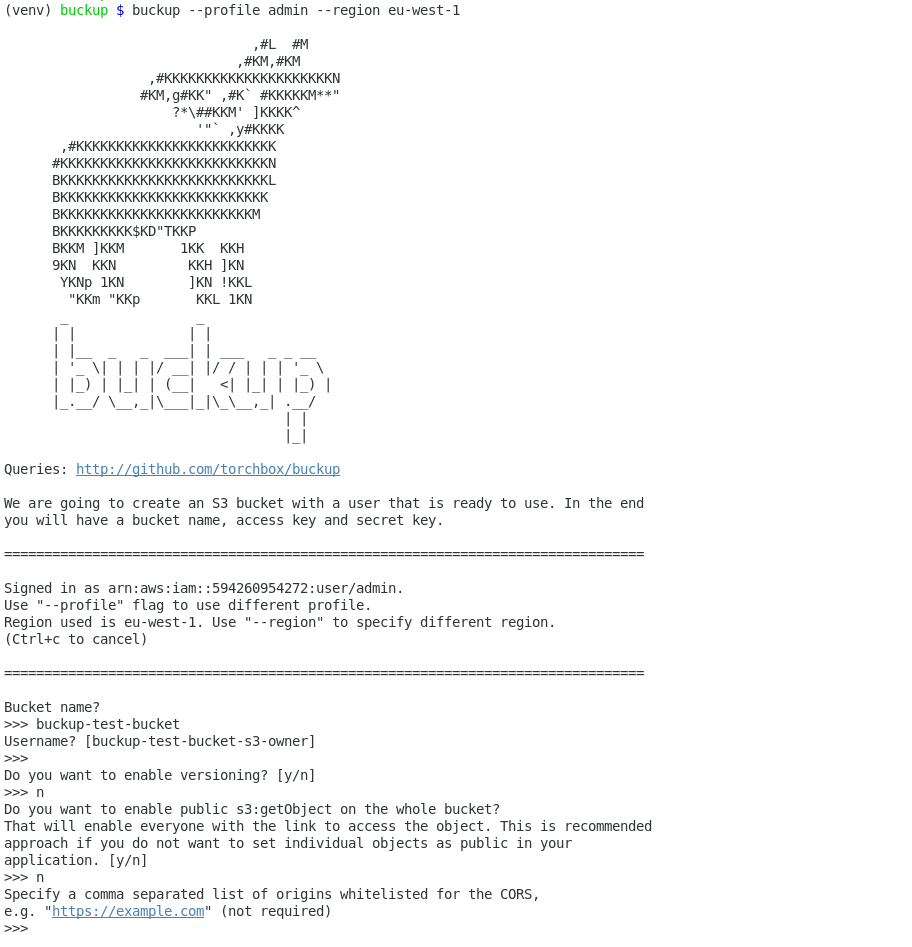
![]()
Create S3 bucket, policy and user with one command. After creation it is ready to use on your project.
- Create bucket
- Enable versioning
- Set CORS
- Create user and generate access key pair and give it permissions to the bucket.
- Set policy to enable s3:GetObject permission on every object in your bucket to the public.
- Python 3
- boto3
python3 -m pip install buckupBuckup can be found on AUR.
cd /tmp
git clone https://aur.archlinux.org/buckup.git
cd buckup
makepkg -siBuckup can be installed from Torchbox's Homebrew tap.
brew tap torchbox/tap
brew install buckupYou can easily install buckup inside a virtual environment and work on it there, e.g.
git clone [email protected]:torchbox/buckup.git
cd buckup
python3 -m venv venv
source venv/bin/activate
pip install -e .
buckupFirst you need an AWS account. You need programmatic access key to use it with buckup.
- If you have AWS CLI installed, you can save your credentials with aws configure; or
- you can set
AWS_ACCESS_KEY_IDandAWS_SECRET_ACCESS_KEYenvironment variable containing your credentials.
Read boto3 documentation for more detail.
- If you want to restrict your access only to essential credentials to use
buckup, please set them to:
iam:ListAccountAliases(not required to use)s3:PutBucketPolicys3:CreateBucketiam:GetUseriam:CreateUsers3:PutBucketCORSs3:PutBucketVersioningiam:CreateAccessKey
After you set that up, you can type
buckupand that should open the prompt.- If you want to specify other than the default region, please use
--regionflag withbuckup, e.g.buckup --region eu-west-2.
- If you want to specify other than the default region, please use
After you answer all the questions you should obtain your bucket details that are ready to use in your application.