Install Pro
Solodev is a professionally managed, enterprise-class Content Management System (CMS). Before launching one of our products, you'll first need to subscribe to Solodev on the AWS Marketplace. Click the button below to get started:
 |
Already have a Solodev license? Call 1-800-859-7656 and we’ll activate your subscription for you.
Once you complete your subscription in the AWS Marketplace, simply return to the Solodev CMS - Professional Edition product page.
Please note that both a VPC and EC2 Key Pair must be configured within the region you intend to launch your stack. If the following items are already created, you can skip directly to launch.
Once you’ve configured your VPC and EC2 Key Pair, you can launch your CloudFormation stack. Select the AWS region of your choice on the Solodev CMS - Professional Edition product page.
Clicking on the "Launch Stack" button will redirect you to the the Create Stack wizard.
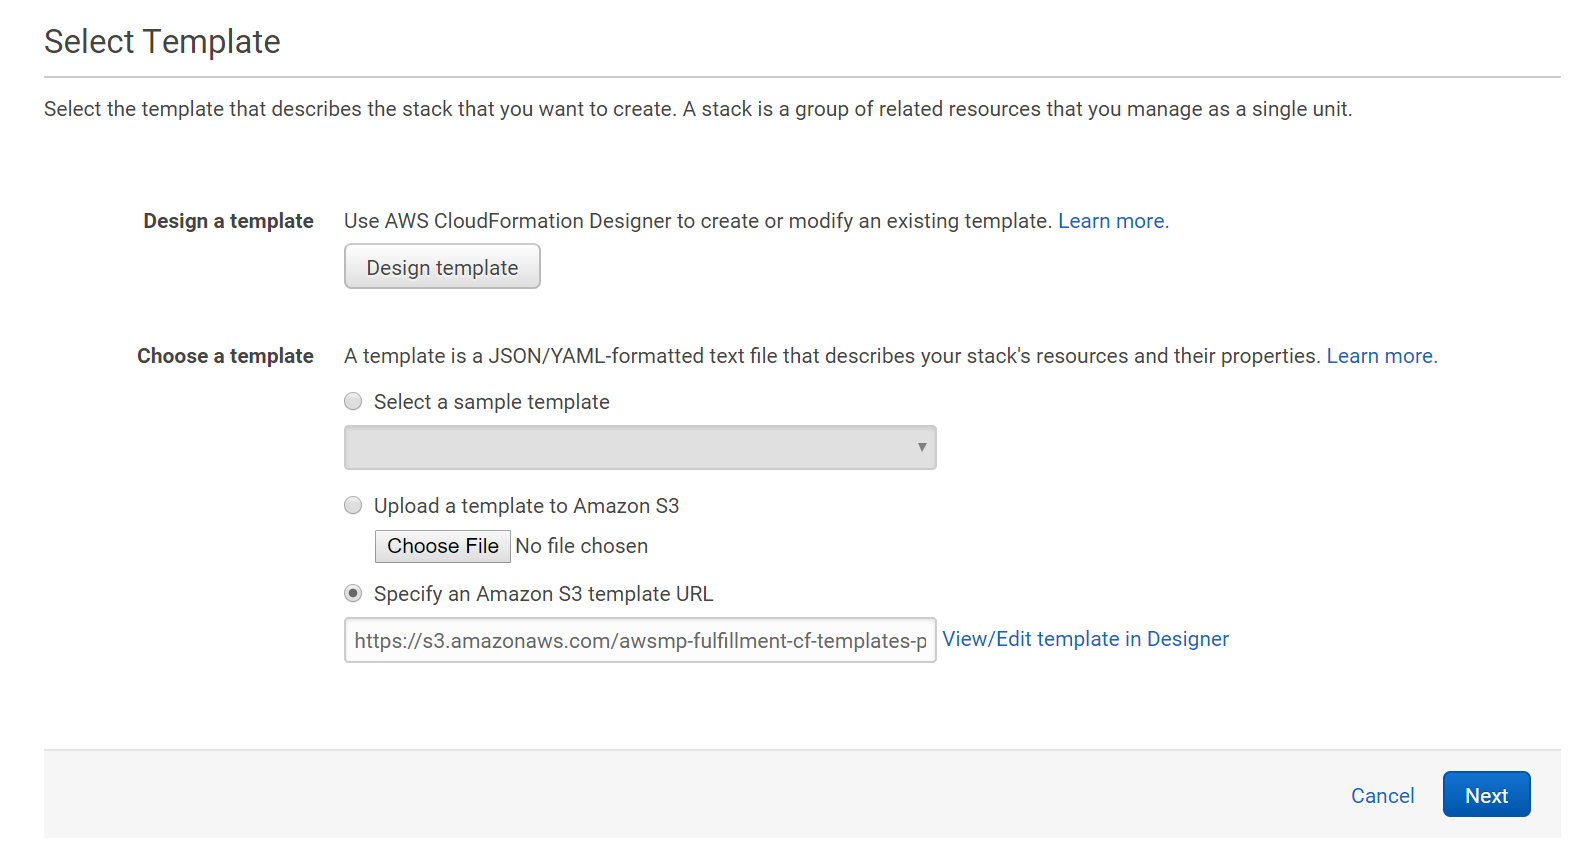
Select Template
Select the template used to create the stack. The "solodev-pro-single.yaml" template should be preselected. Click "Next" to continue.
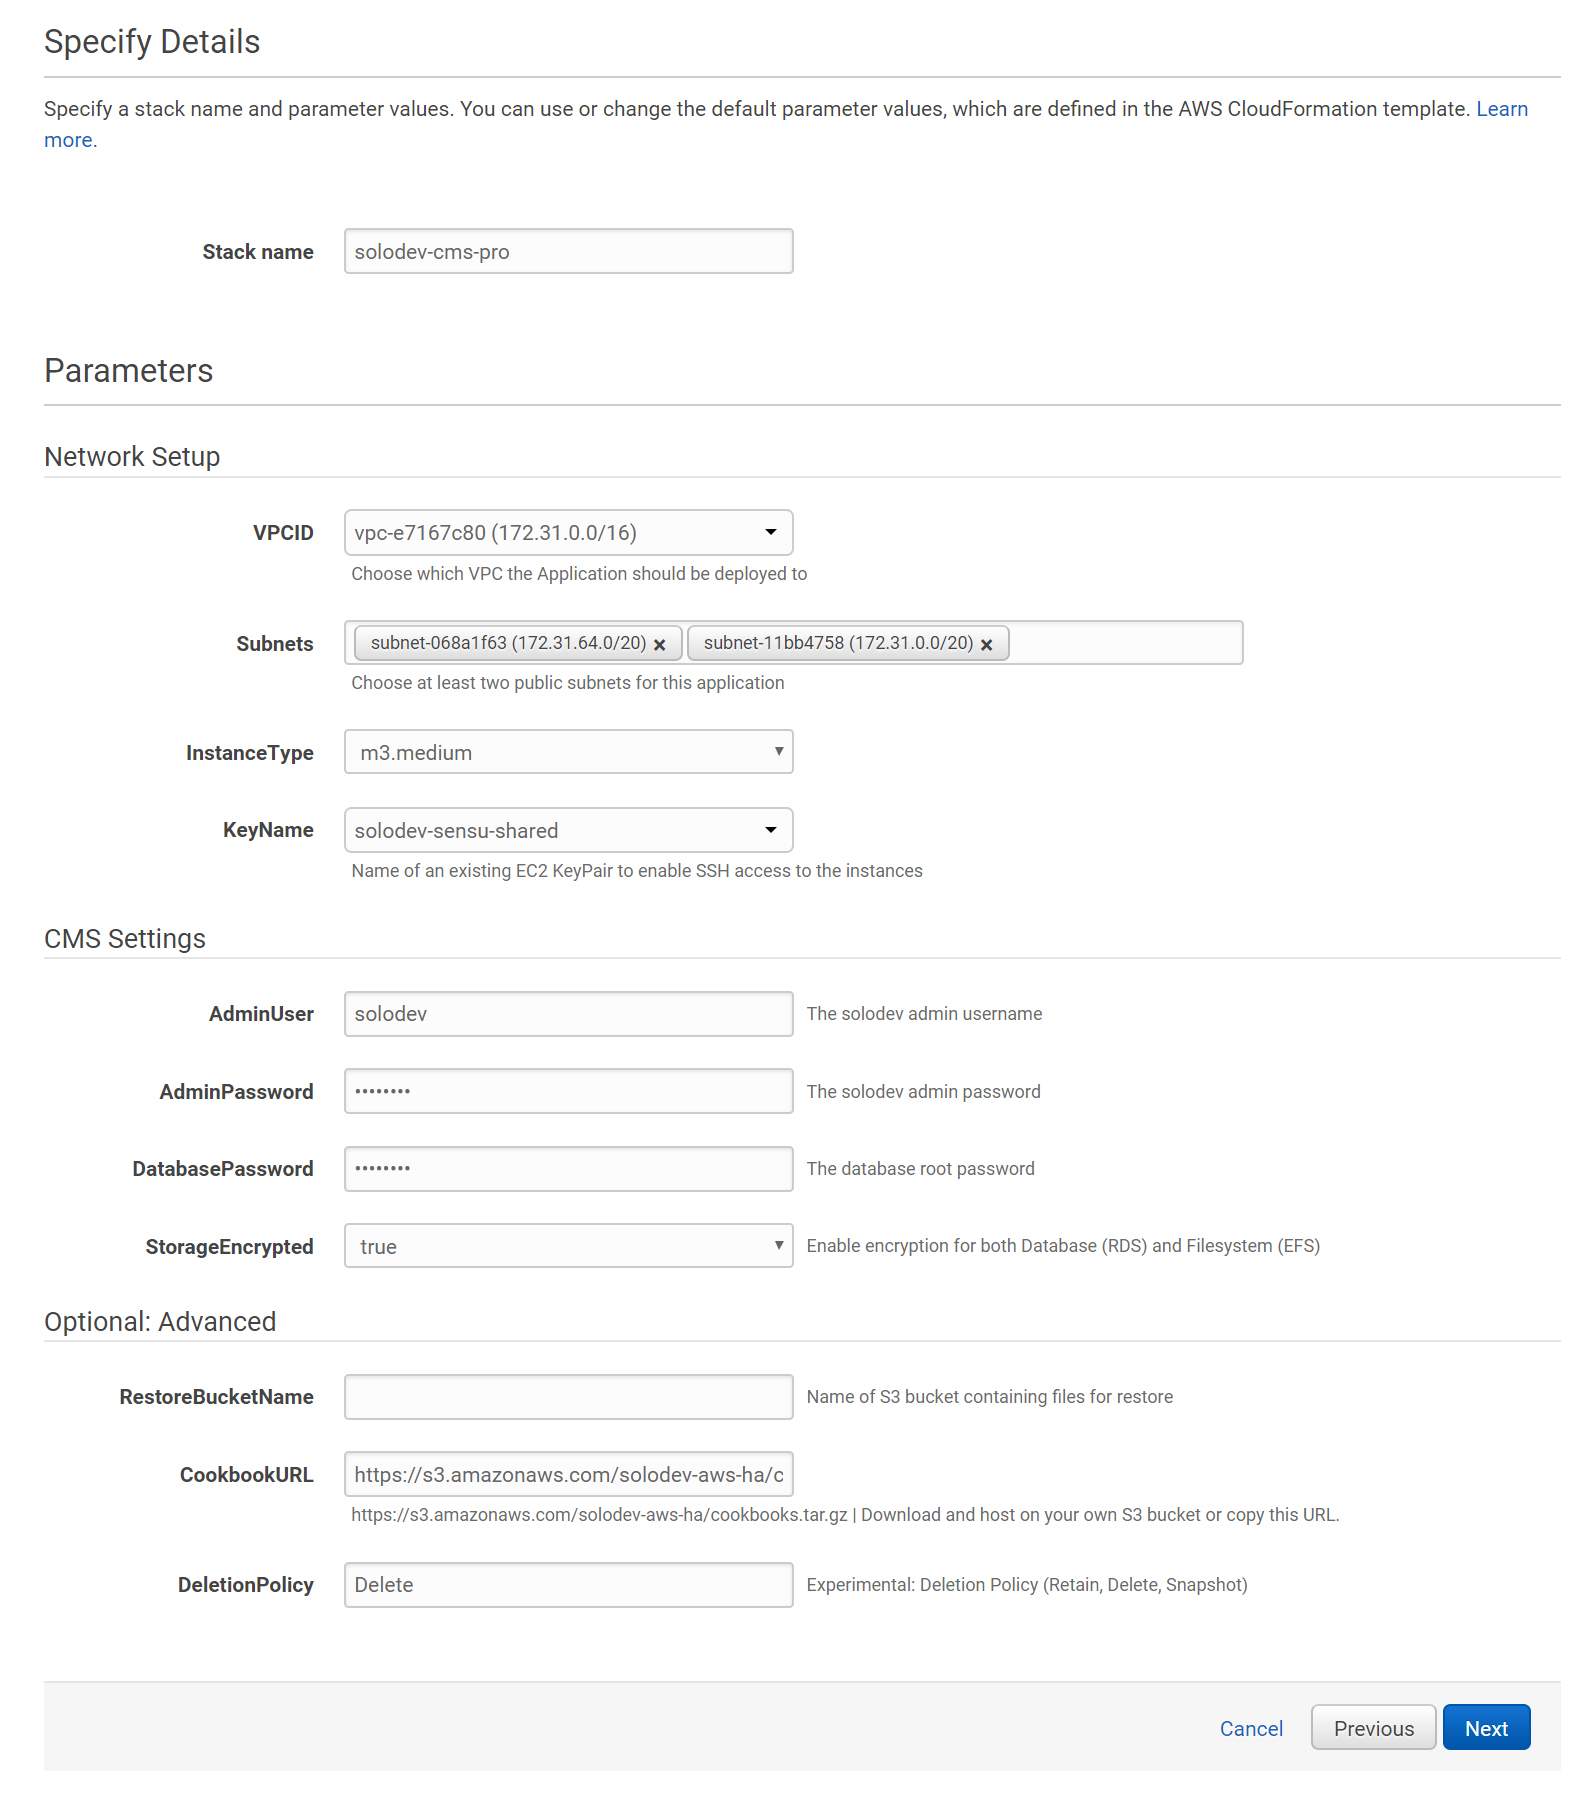
Specify Details
Configure your stack name (set to "solodev-cms" by default) and the various stack parameters. For a full description of these parameters, visit the Install Parameters page.
Options
Configure the stack options. In most instances, the default options are recommended and you can click "Next" to continue. For a full description of these options, visit the Install Options page.

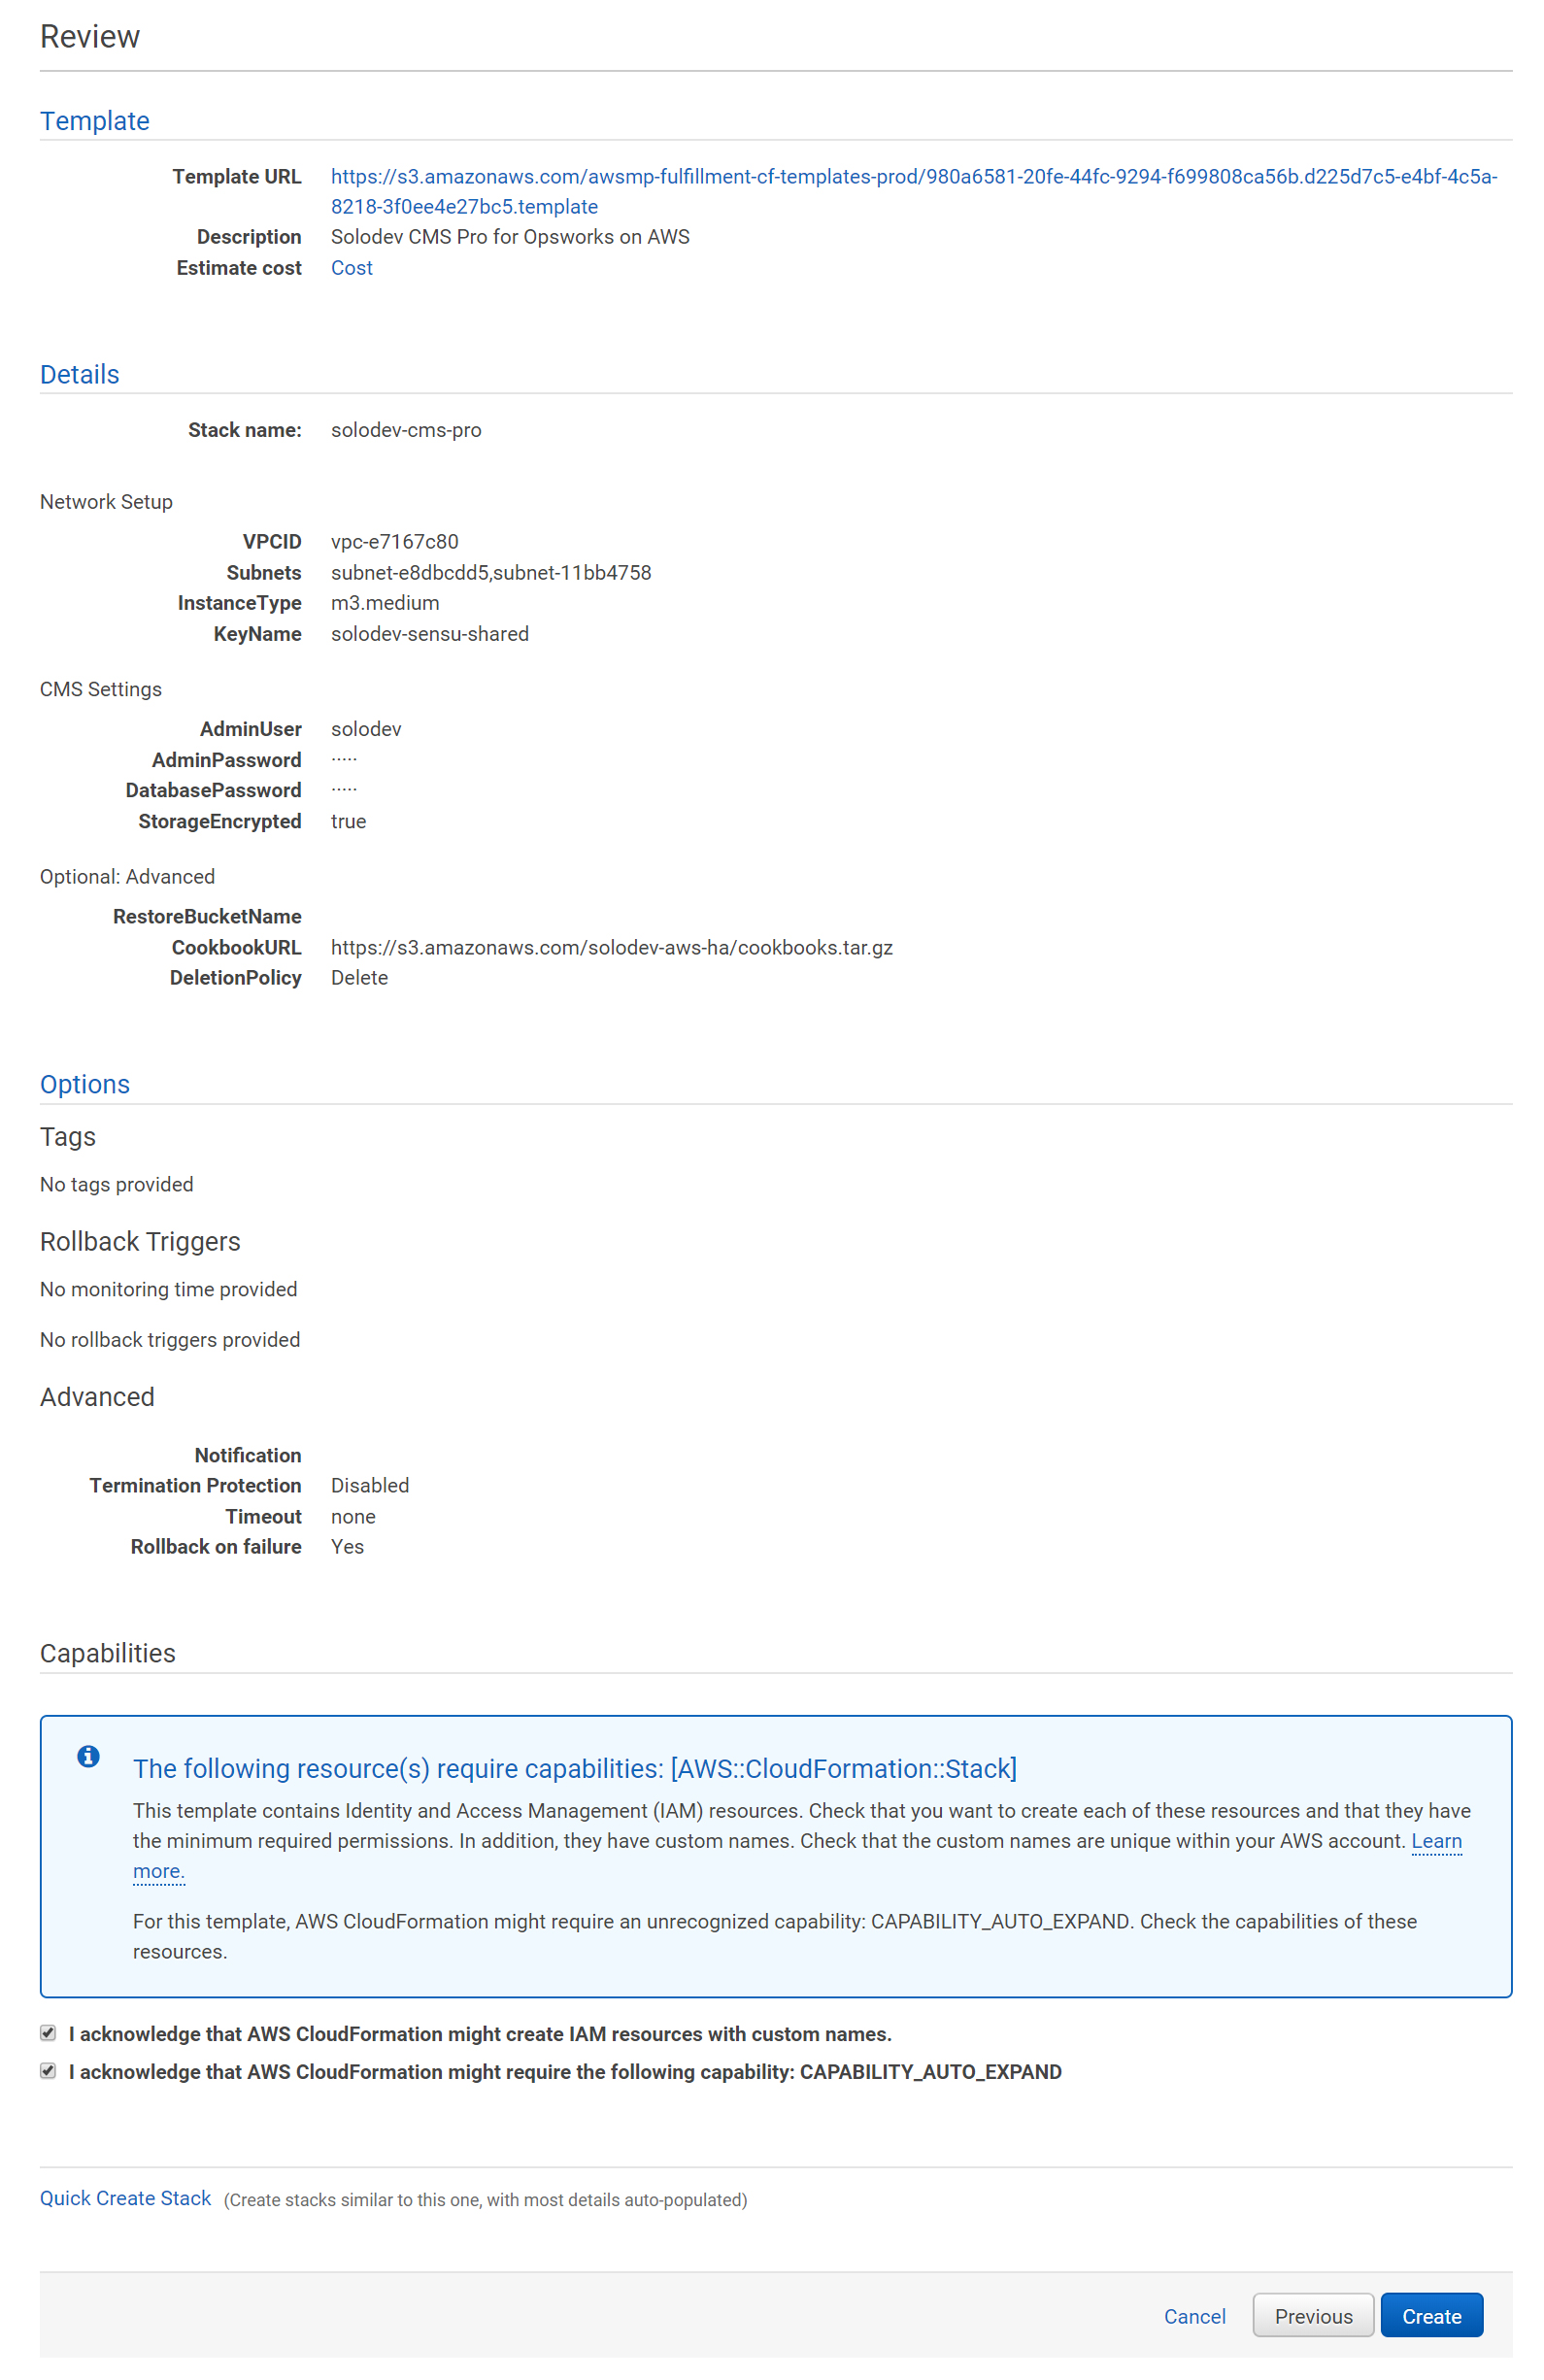
Review
With everything configured, review your details and options. Ensure that the "I acknowledge that AWS CloudFormation might create IAM resources with custom names" checkbox is selected and click on the "Create" button to launch your stack.
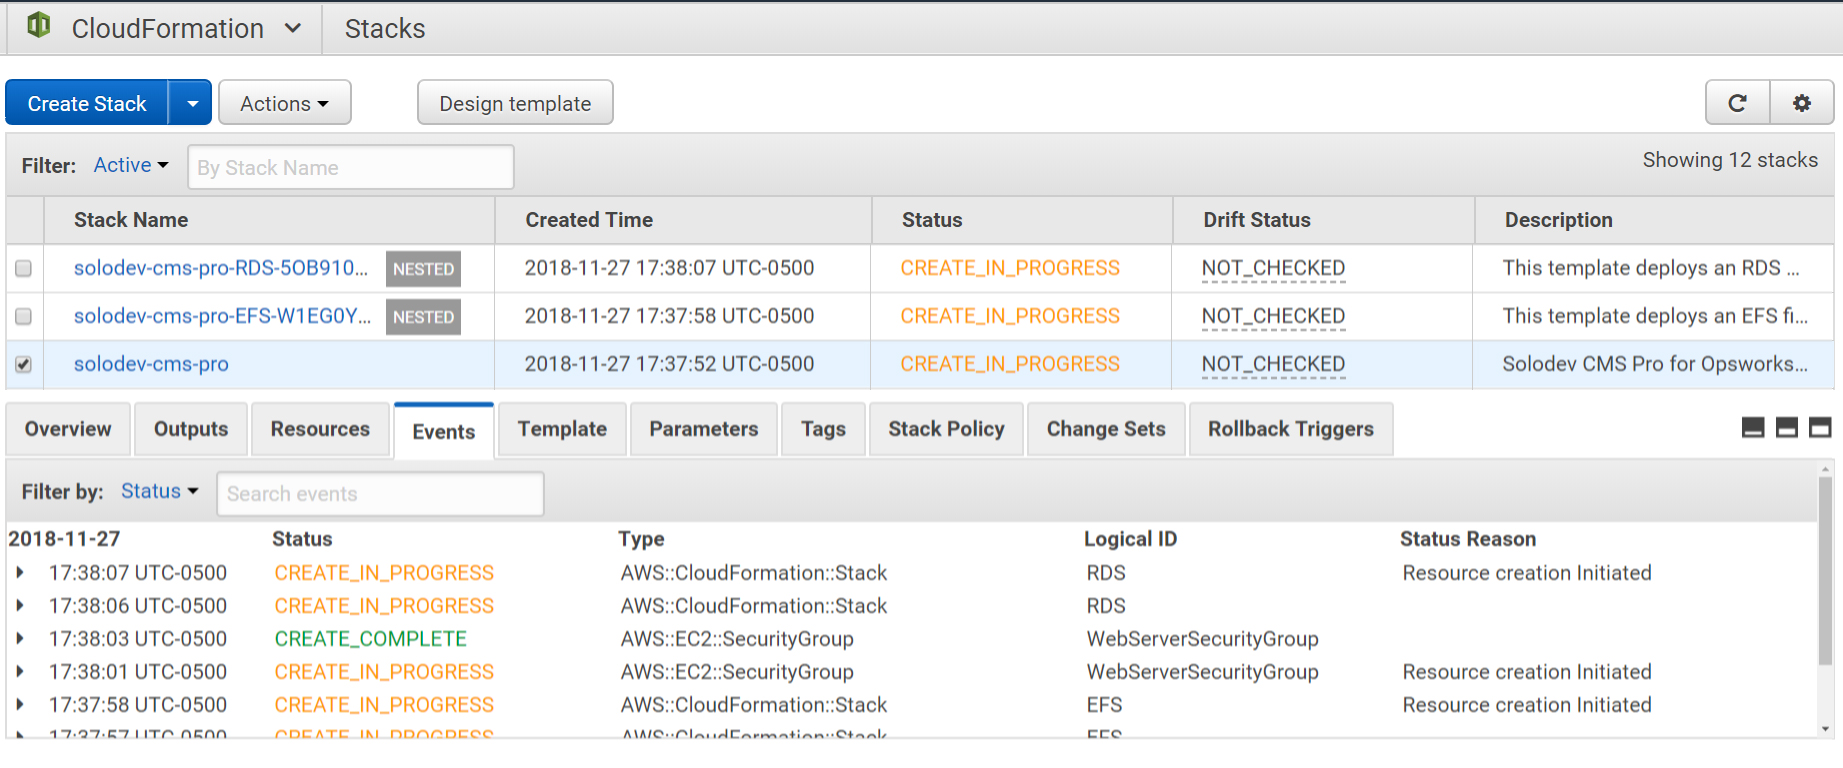
Upon launching your CloudFormation stack, you will be able to monitor the installation logs under the "Events" tab. The CloudFormation template will launch several stacks related to your Solodev instance including EFS, EDS, and EC2. If you encounter any failures during this time, please visit the Common Issues page to begin troubleshooting.
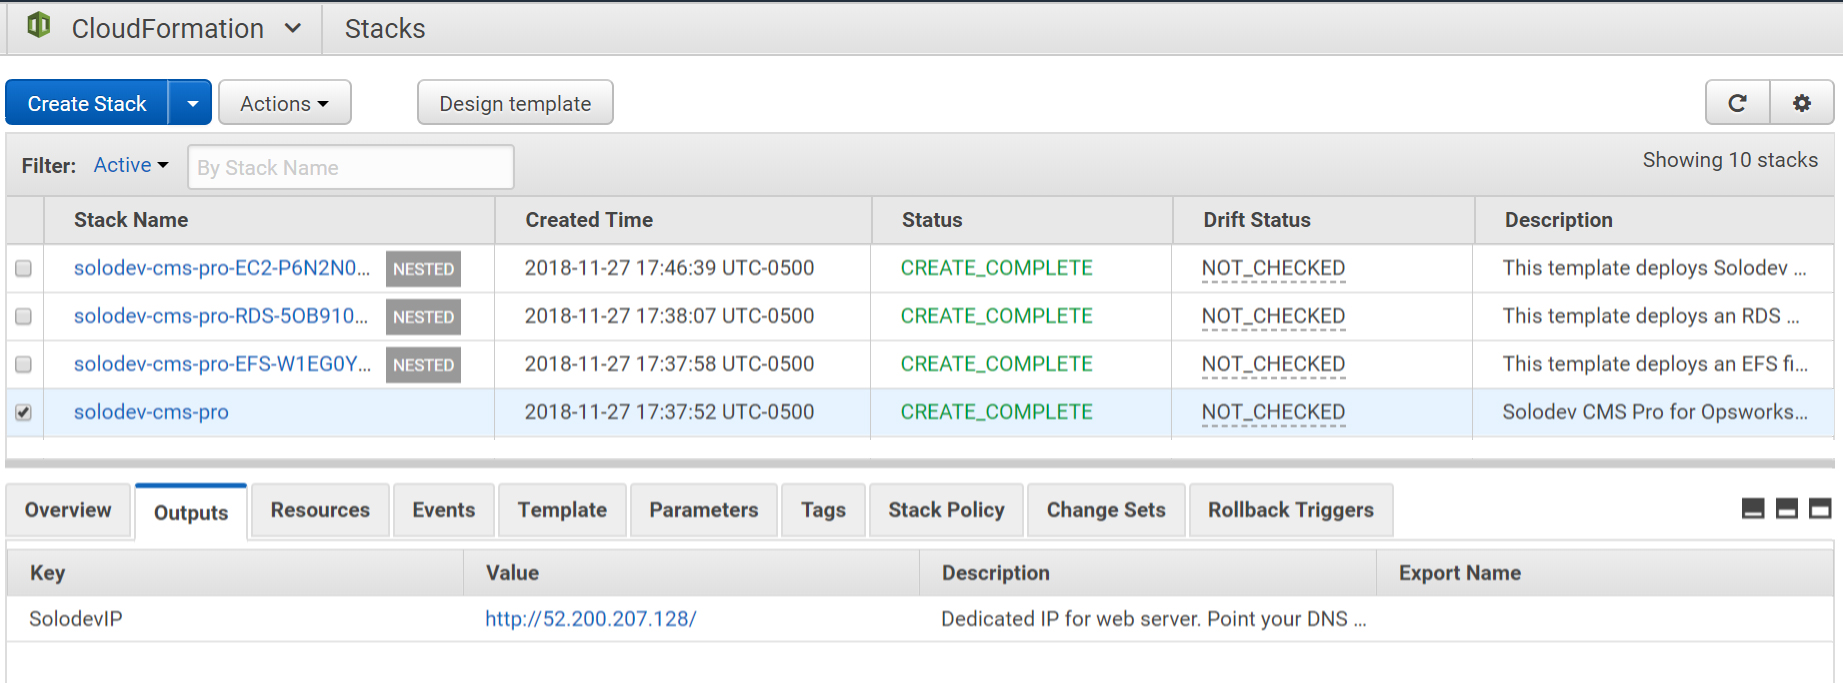
If your stack builds successfully, you will see the green "CREATE_COMPLETE" message. Click on the primary stack and view the "Outputs" tab. You will find the IP address associated with the Solodev backend.
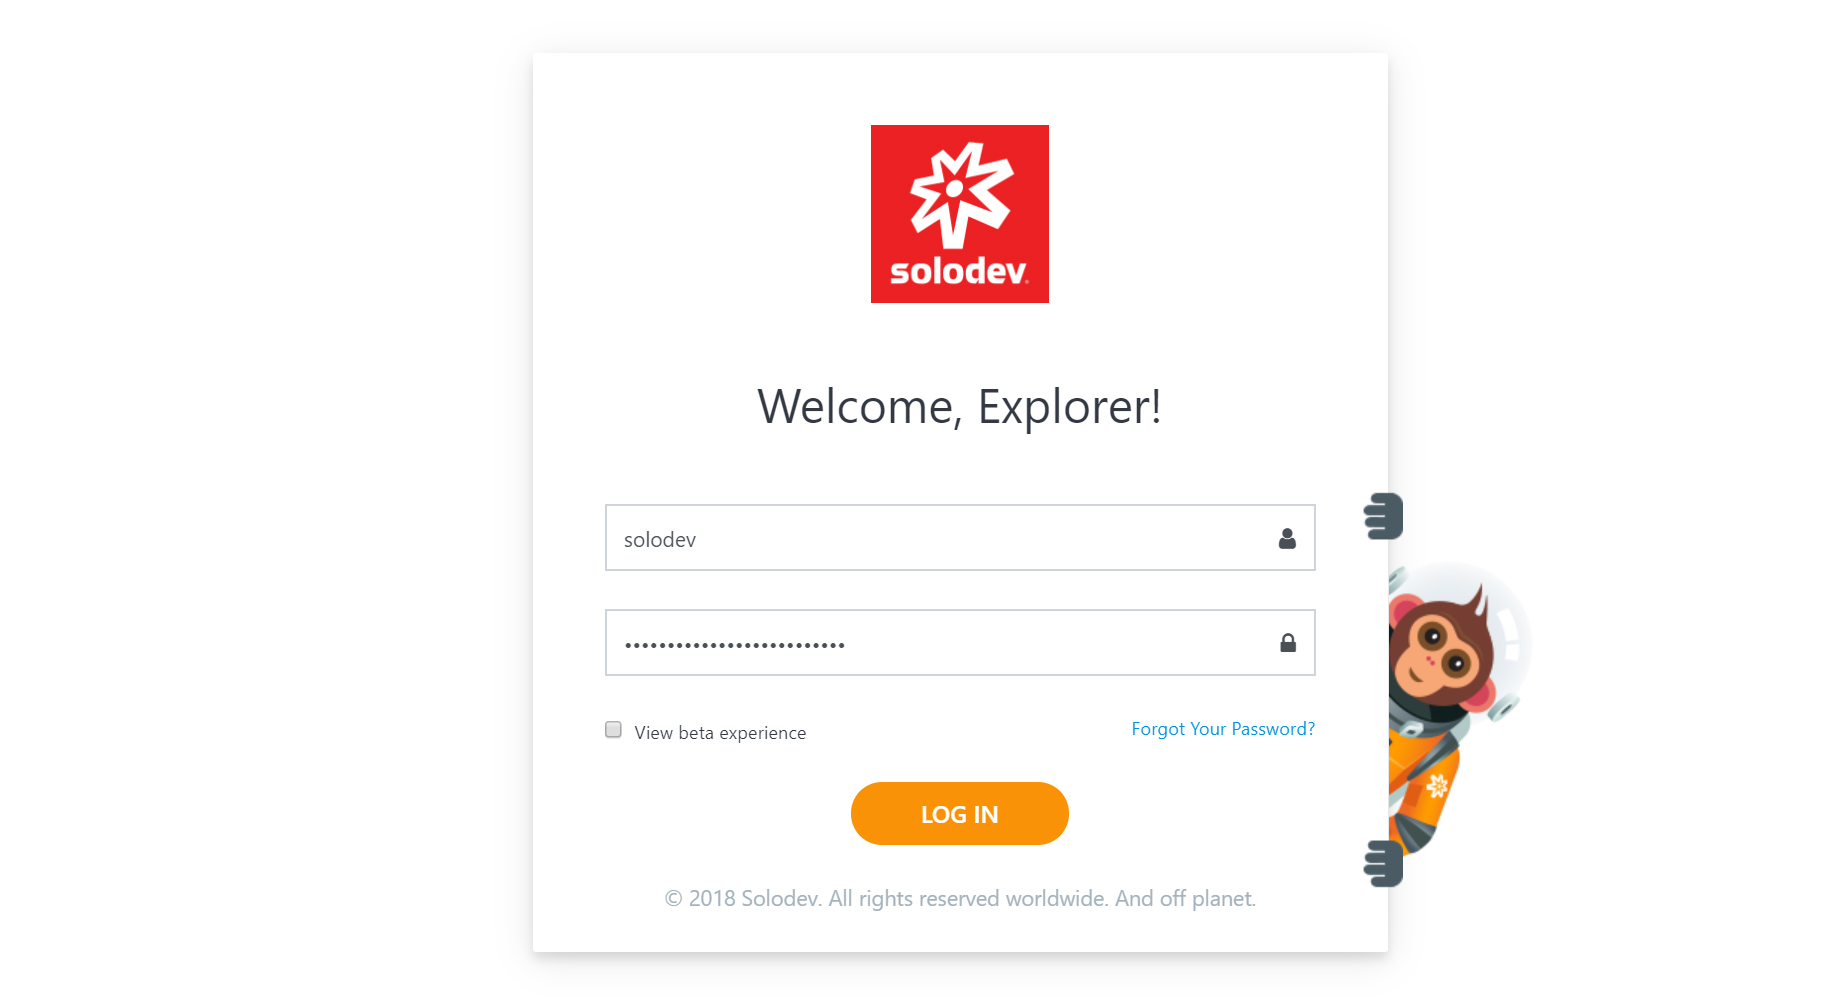
Visit the IP address acquired in Step 7. Login to CMS using the username "Solodev" and the password you configured in Step 5.
© 2019 Solodev. All rights reserved worldwide. And off planet. Visit solodev.com to learn more.