Update Pro
Updating Solodev CMS Pro involves logging into the AWS account associated with your instance, navigating to OpsWorks, updating the Chef cookbooks associated with the stack, changing the "CMSVersion" parameter to the updated version, and then finally redeploy the Solodev app.
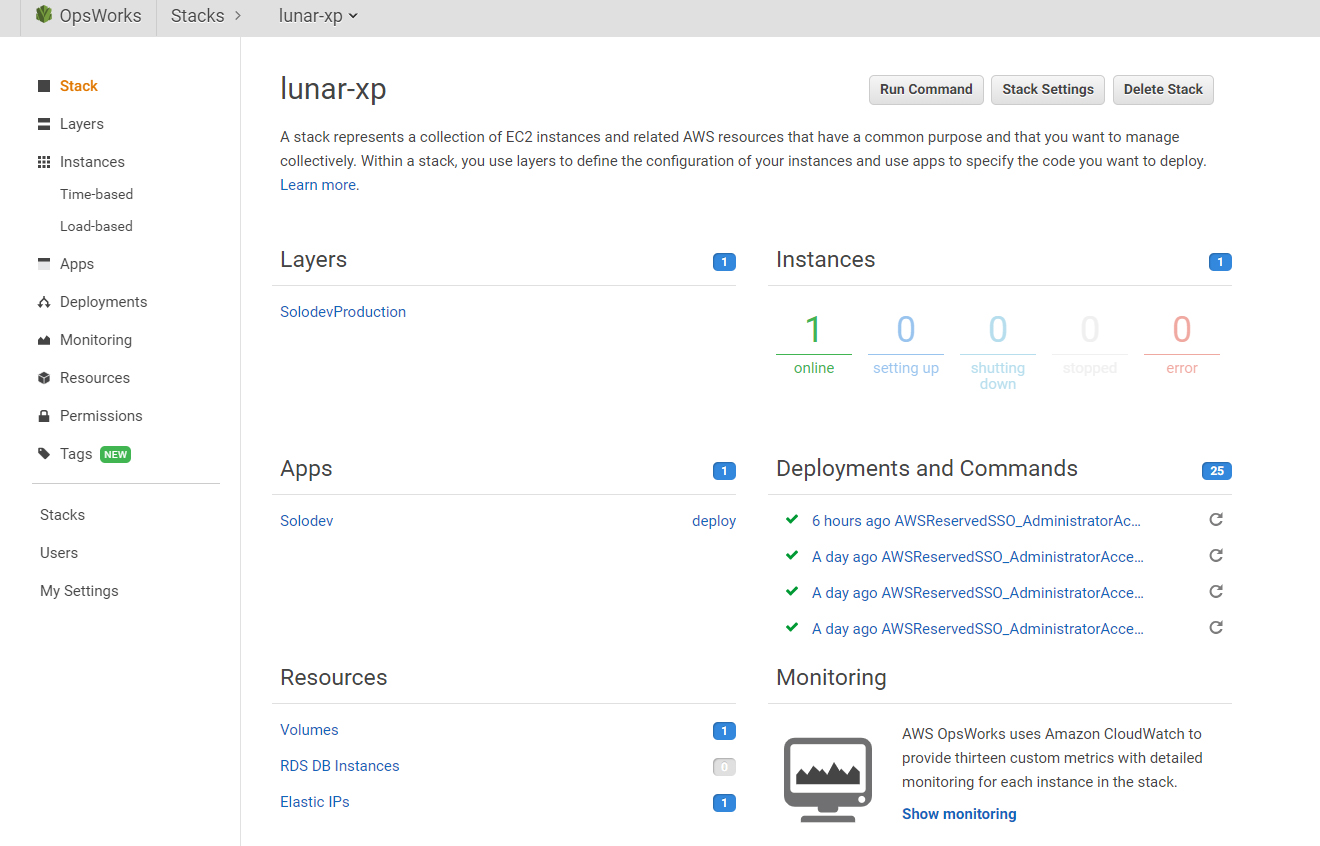
- From your stack dashboard, click on the "Run Command" button
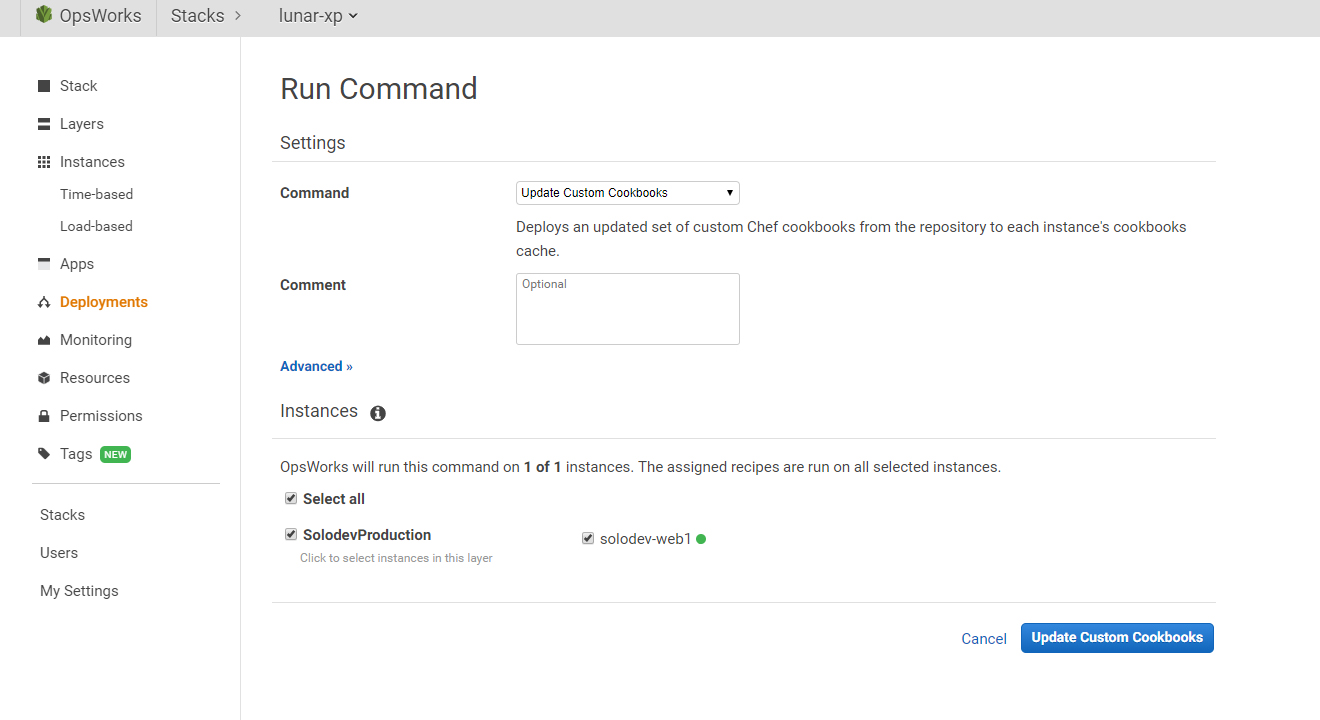
- Ensure "Update Custom Cookbooks" is selected as the command
- Ensure the "Select all" checkbox is selected under "Instances"
- Click on the "Update Custom Cookbooks" button
- From your stack dashboard, click on the "Stack Settings" button
- Click on the "Edit" button
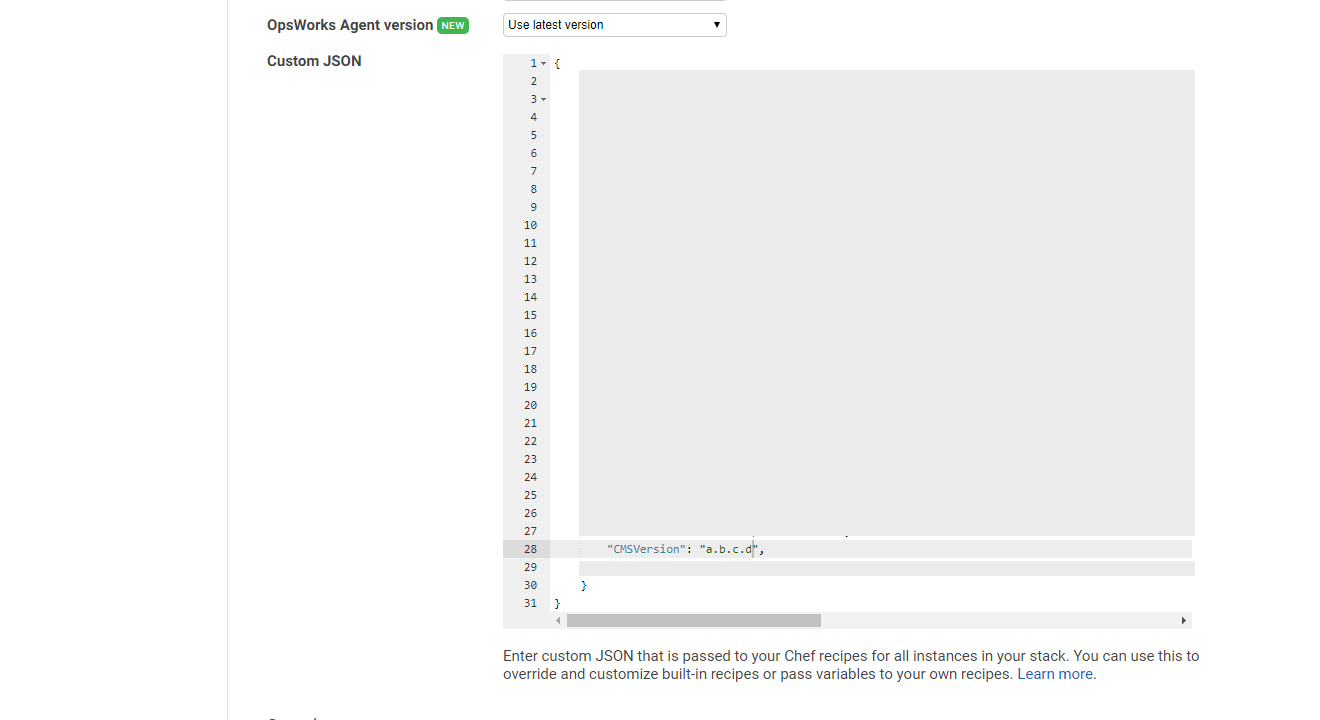
- Modify the "CMSVersion" parameter in the Custom JSON so as to reference the new Solodev version number (Solodev will provide this with your notice of a pending update)
- Click on the "Save" button
- From your stack dashboard, click on "Deployments" in the left navigation
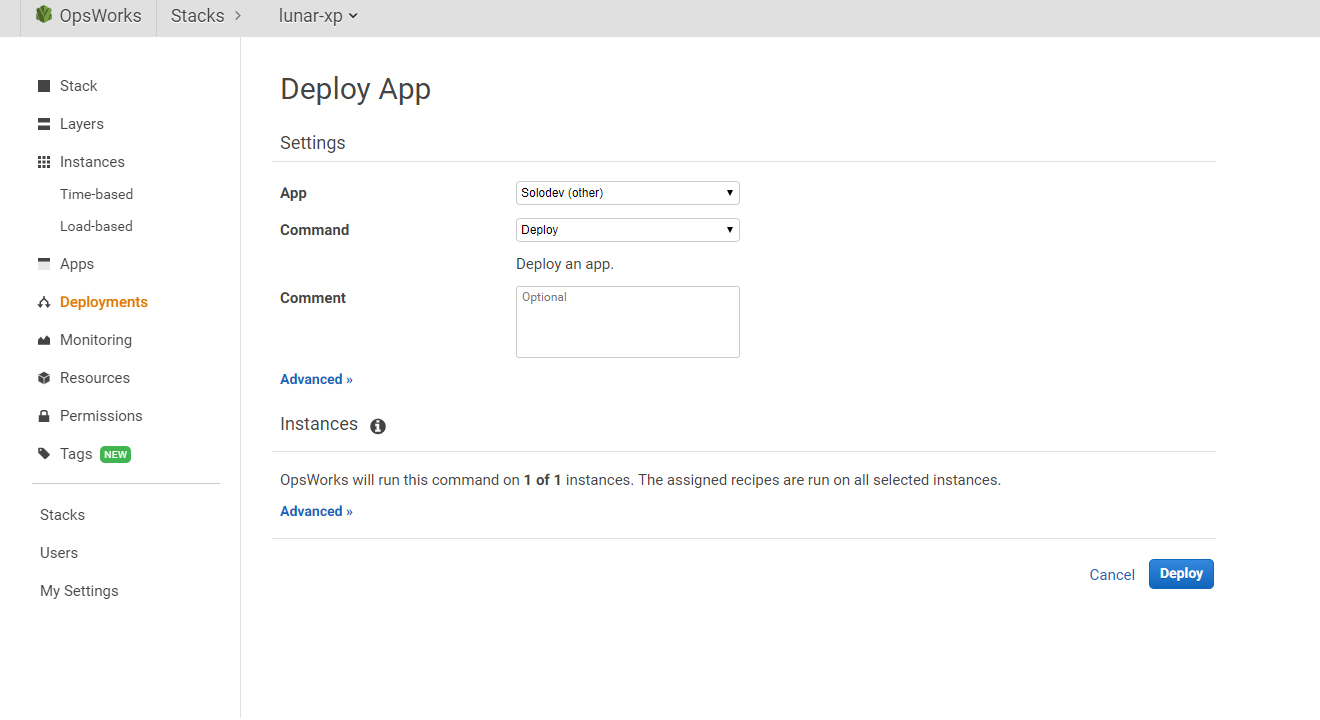
- Click on the "Deploy an App" button
- Ensure "Solodev (other)" is selected as the App
- Click on the "Deploy" button
- This will redeploy Solodev and get the CMSVersion number specified in Step 3
- You will see a checkmark next to the deployment indicating that the stack succesfully updated
© 2019 Solodev. All rights reserved worldwide. And off planet. Visit solodev.com to learn more.